Create a Ground Mount
Create arrays for ground mounted systems
IMPORTANT
Please Note: If your segment outline is not large enough to fit the ground array layout that you specified, nothing will show in the array area until the outline size is increased or the array parameters are adjusted.
1. Create Segment Outline
Draw your segment on the area where you want to place your ground mount. Don't forget to select the Azimuth and Tilt arrow. Tilt will ultimately be the angle in which you want to have your modules at. You can update this value now or wait until after you have your modules placed.
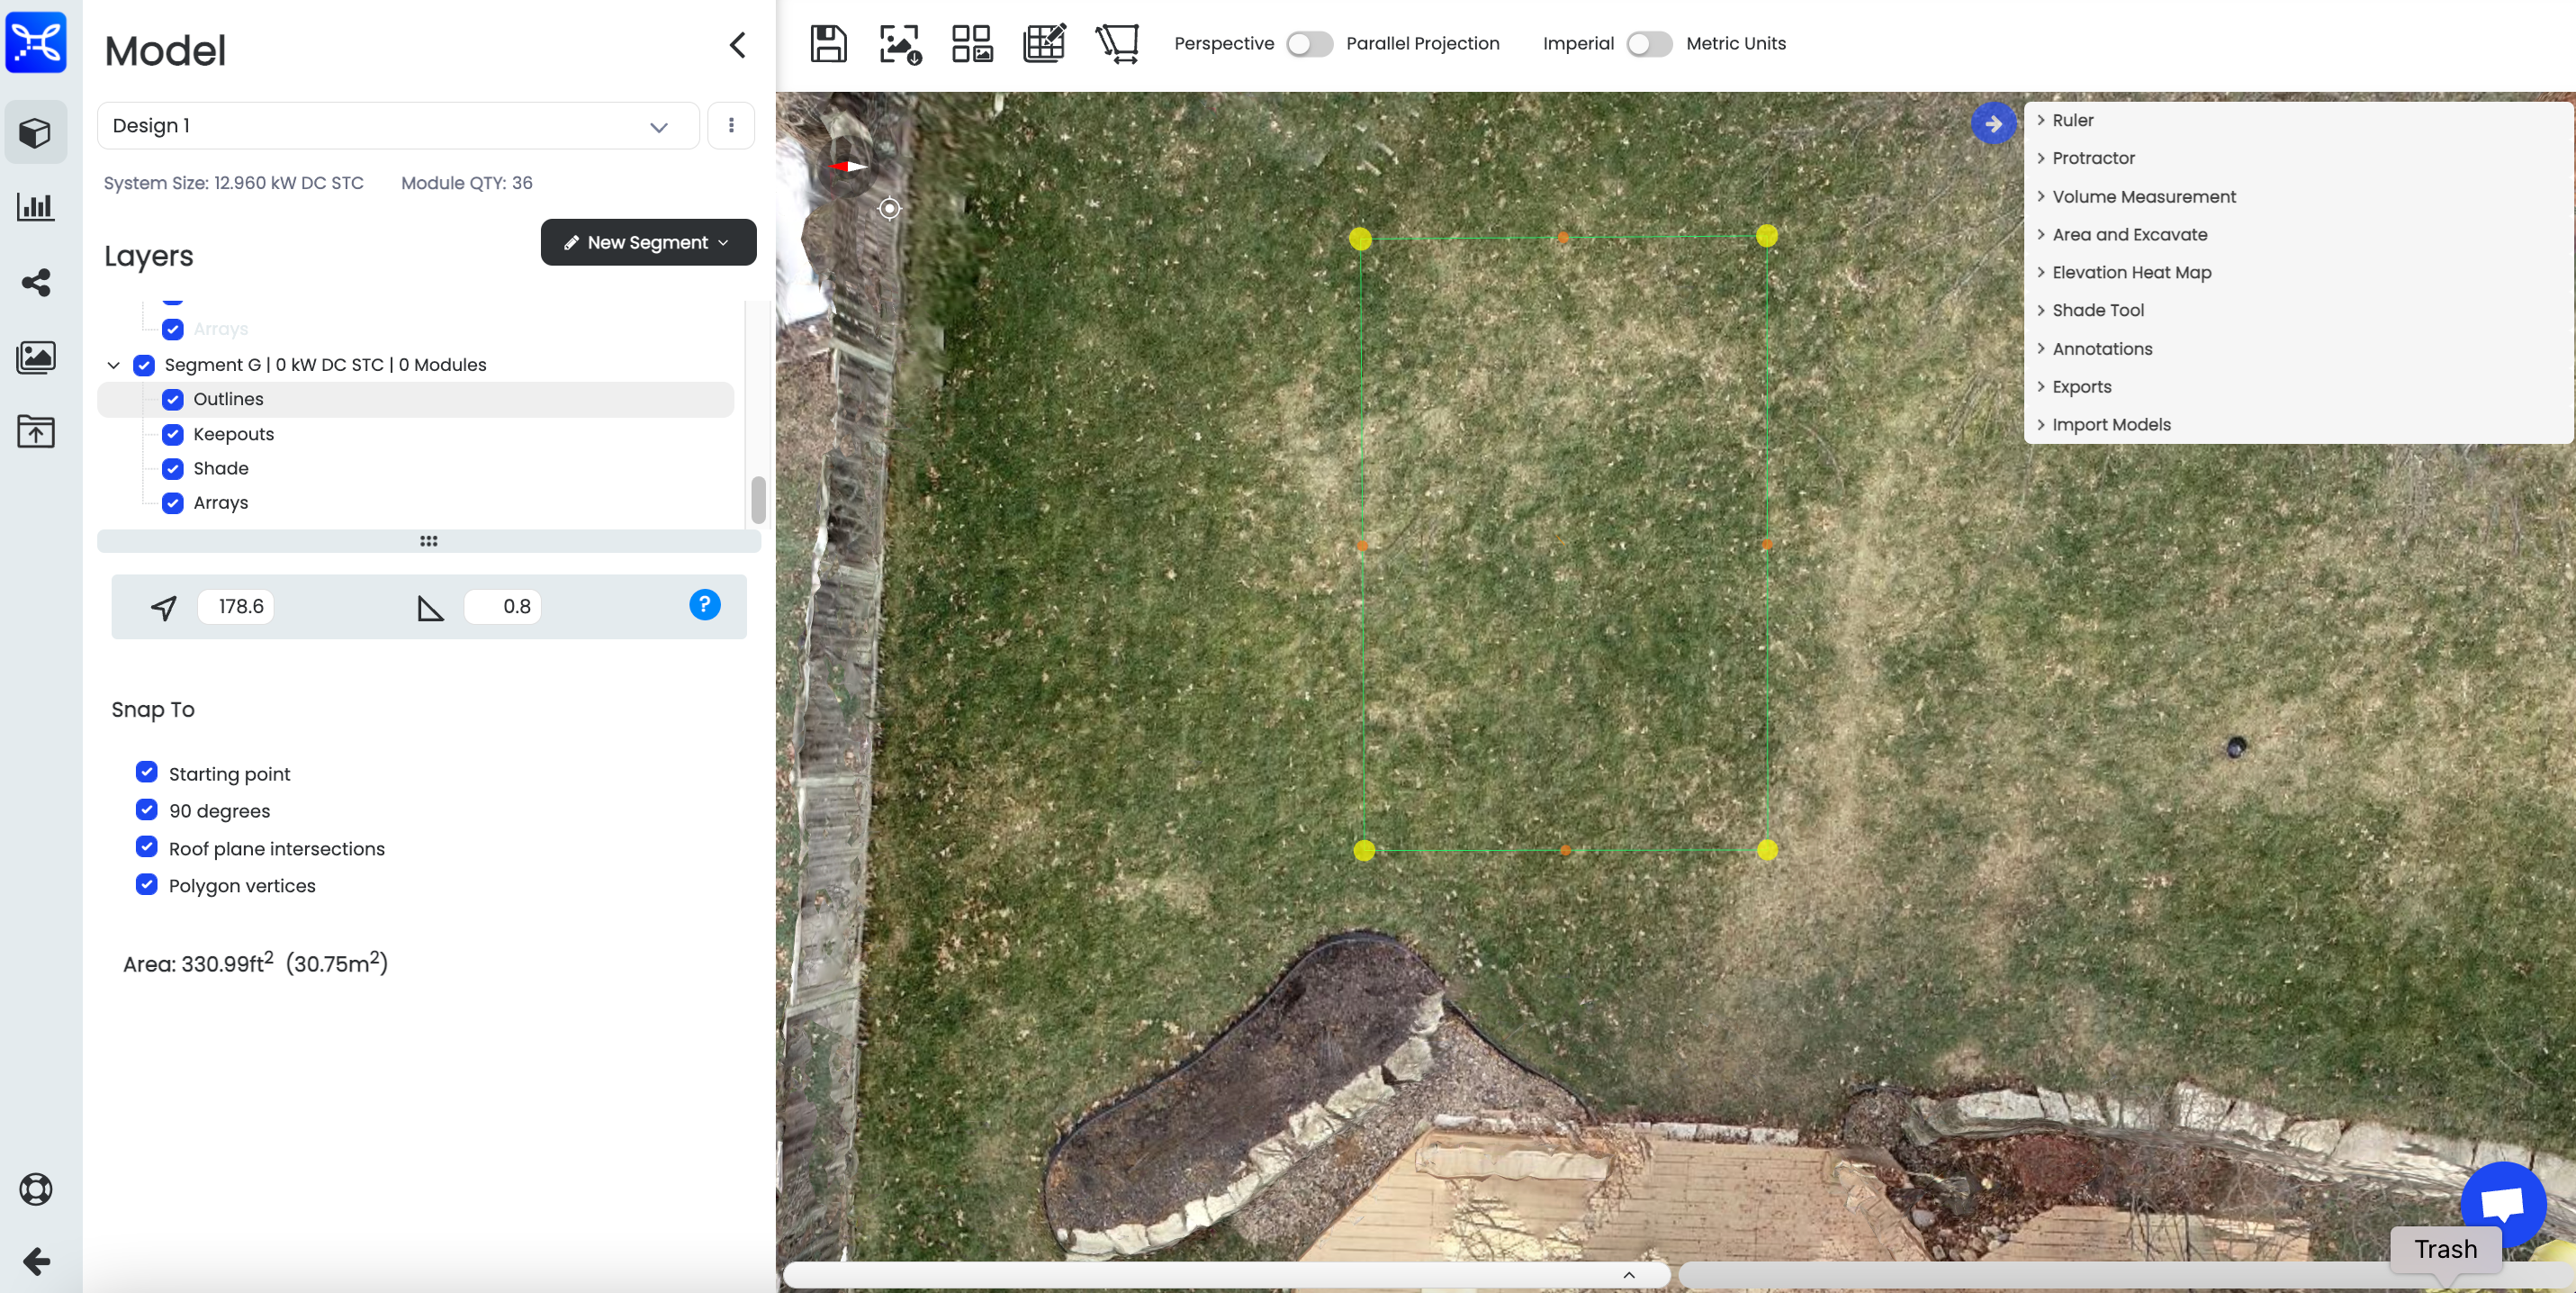
Draw Outline
2. Create Array
On the Arrays Layer, select the module type and turn Array Details “On”.
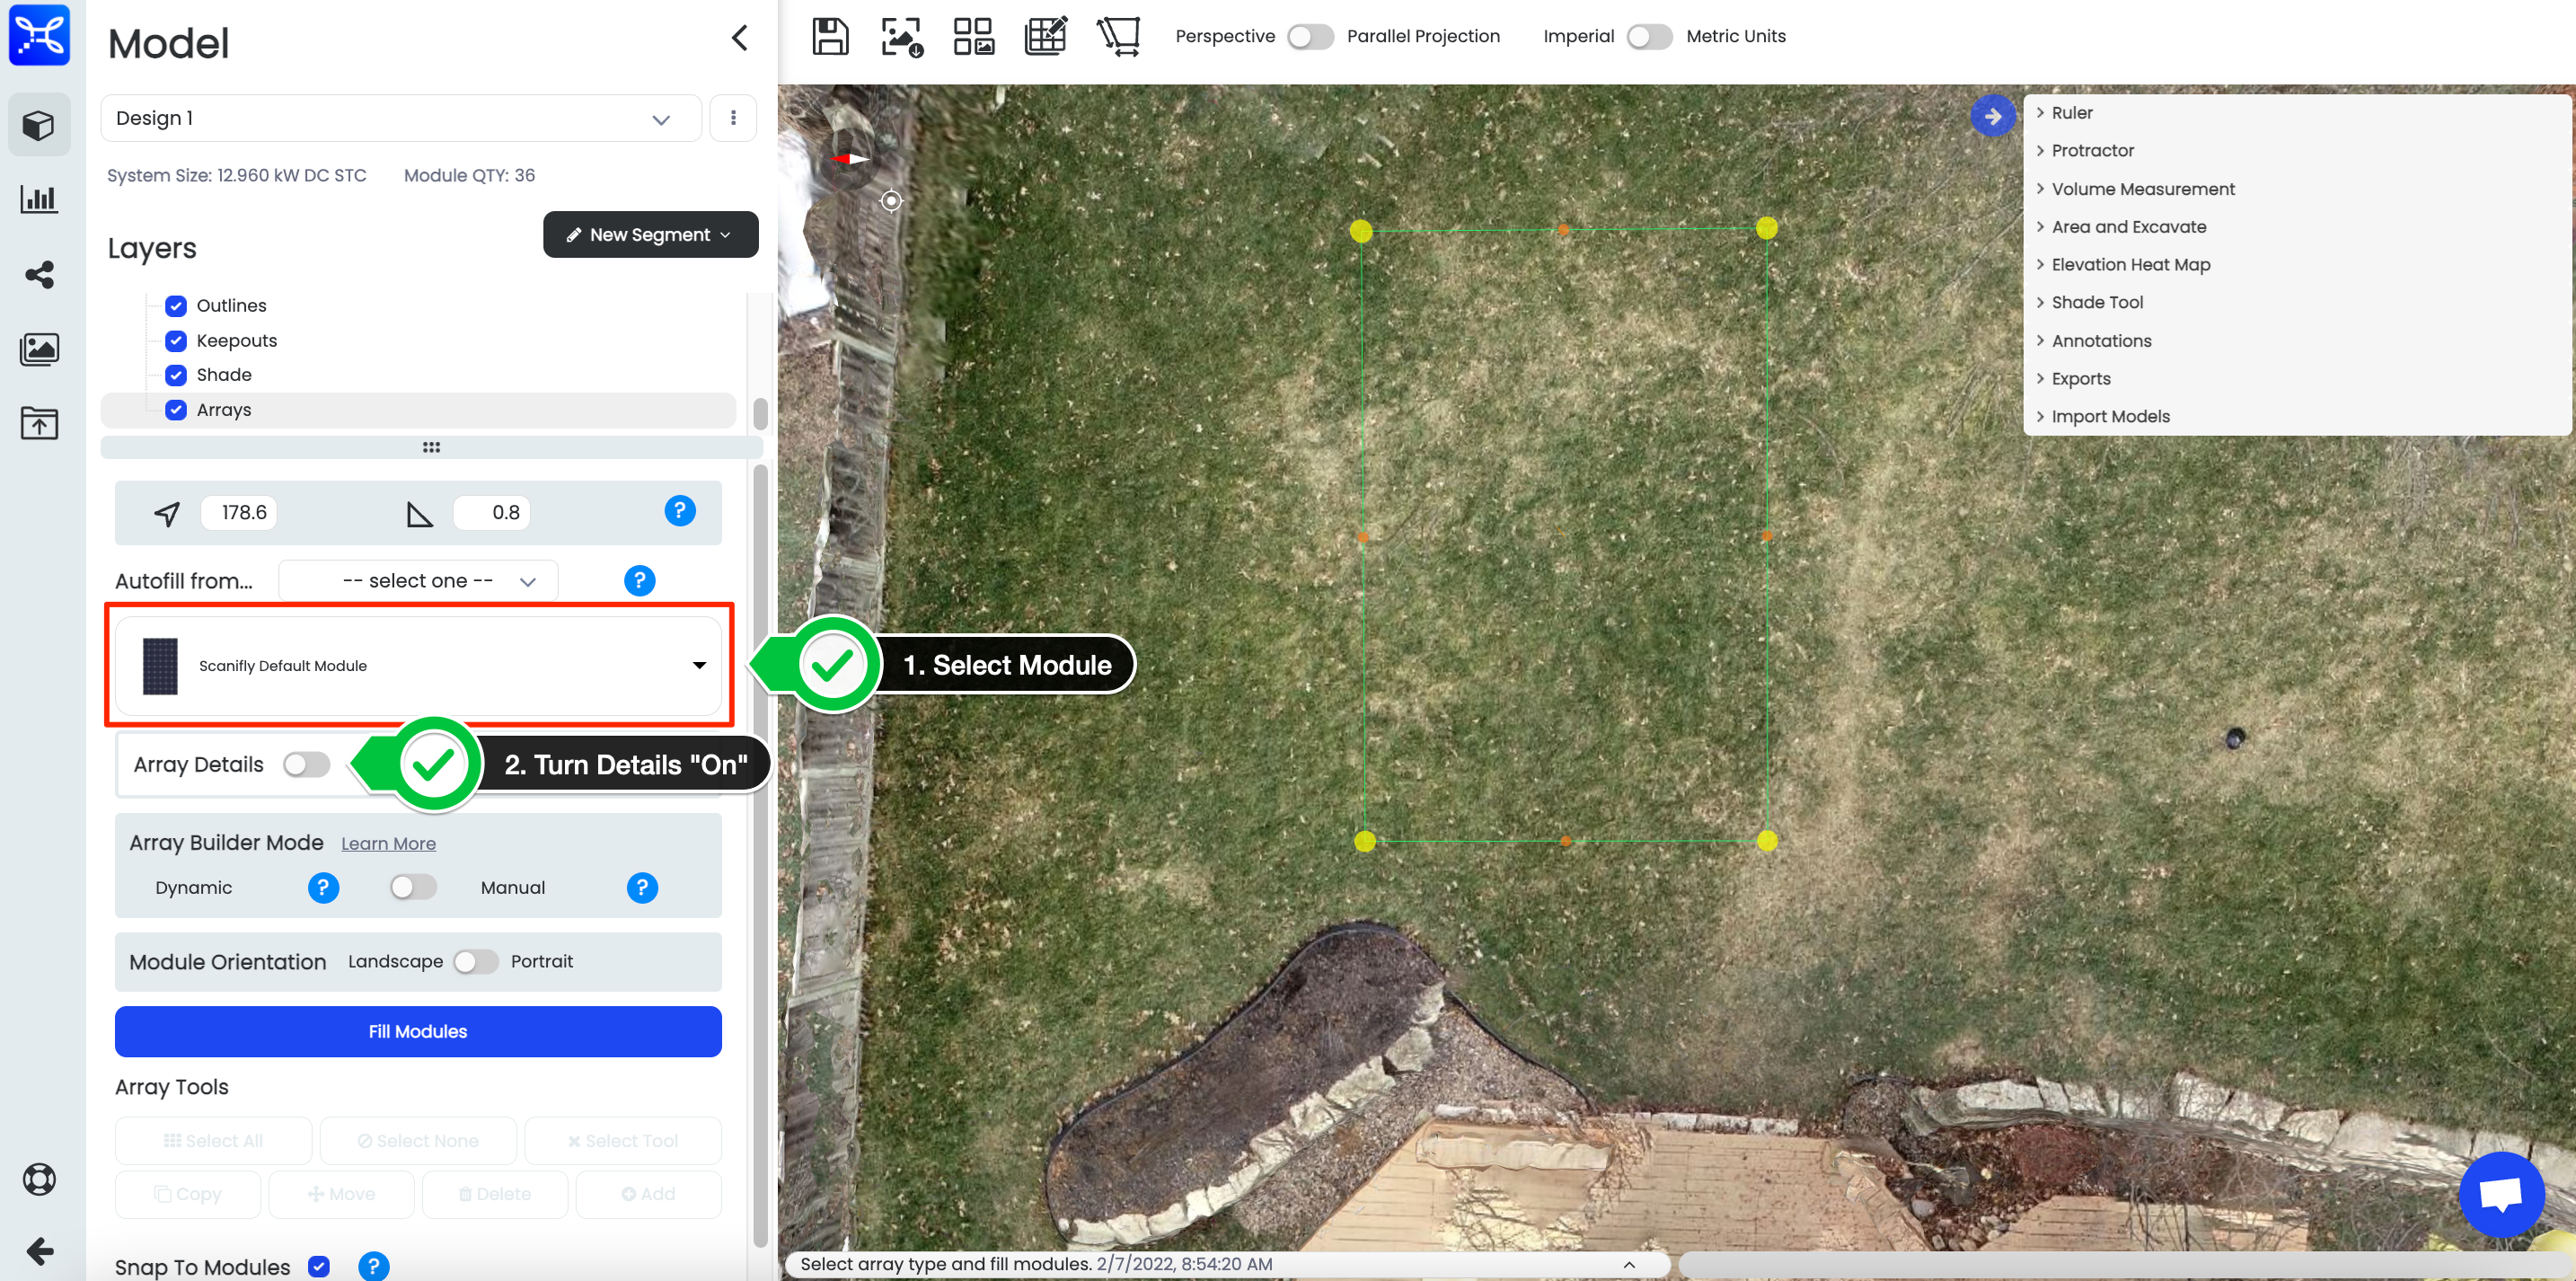
Select Module Type
3. Adjust Array Details
- Change Racking Type to Ground Mount
- Adjust Ground Mount Specs If Necessary
- Keep Array Builder in Dynamic Mode or Change to Manual Mode And Select Orientation
- Click Fill Modules
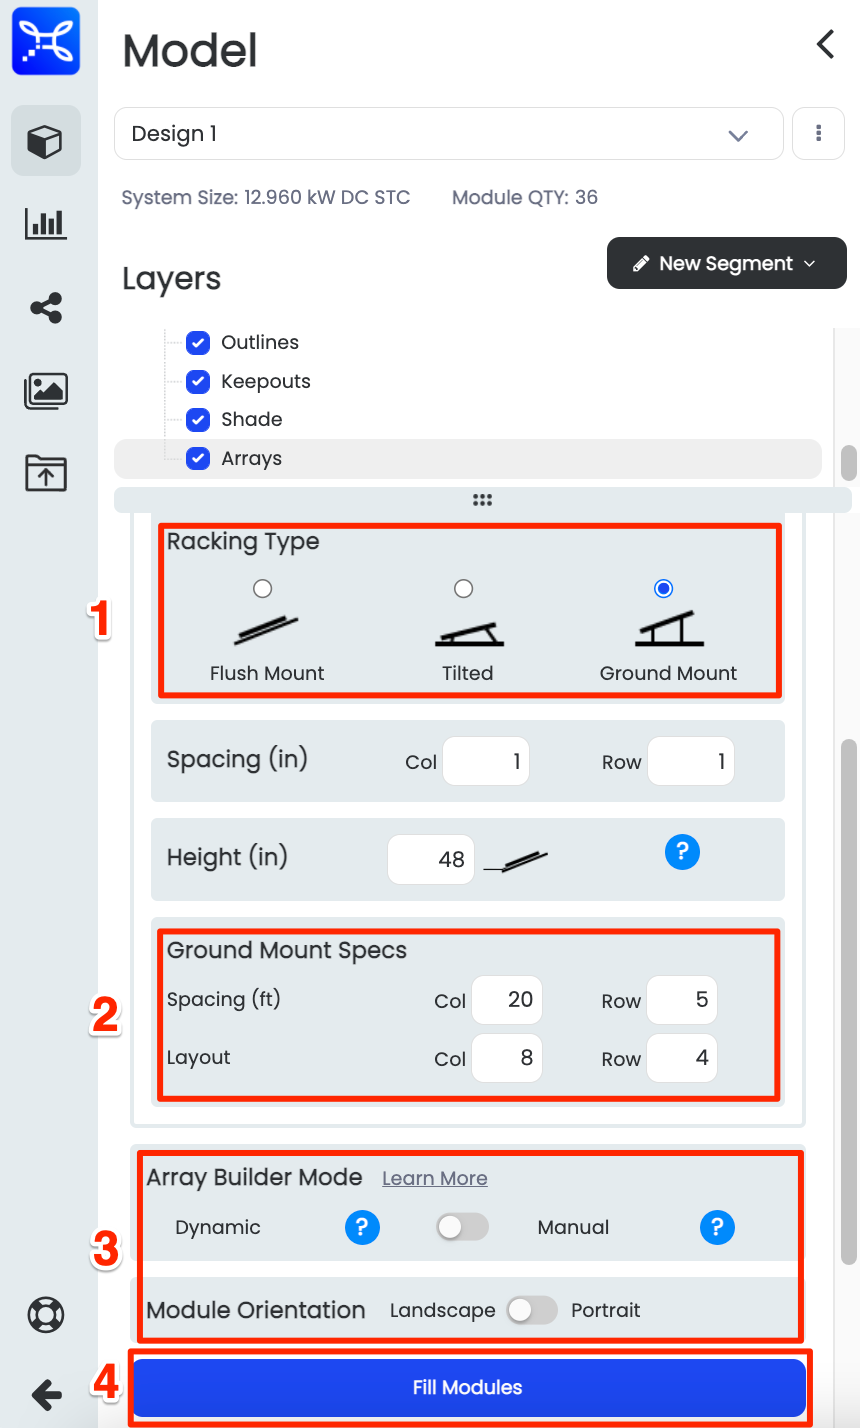
Adjust Array Details
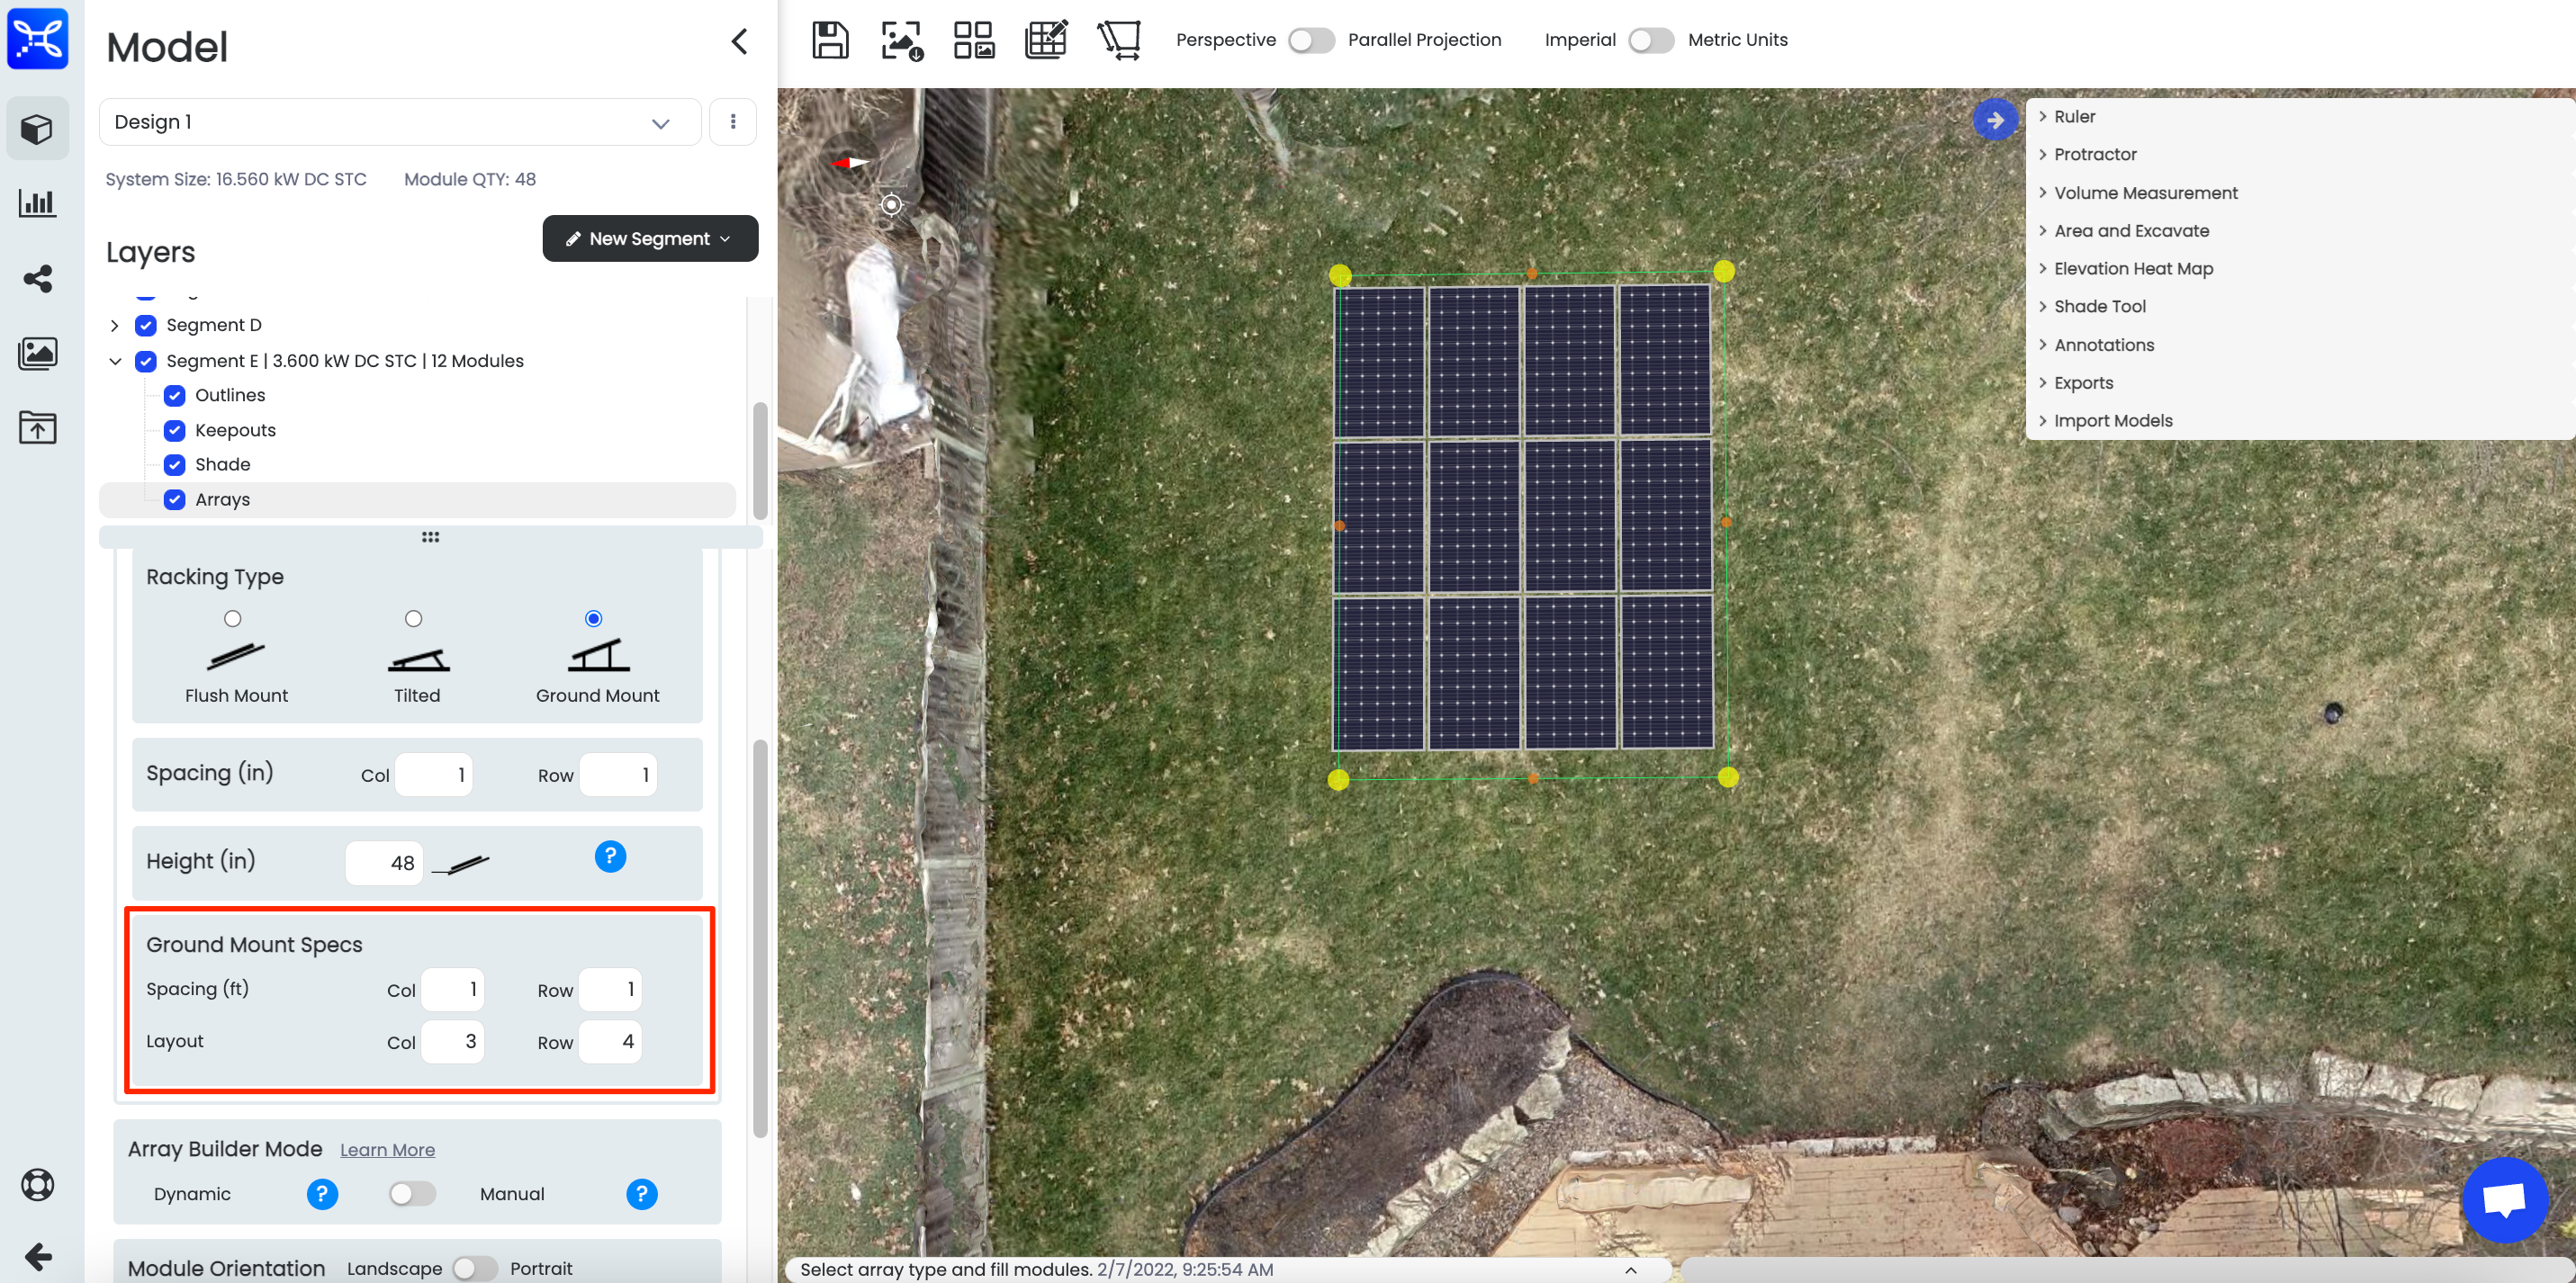
Fine tune Ground Mount Specs
Helpful Tip
If you don't adjust the module specs before adding the array, you can always do this again later.
4. Adjust Tilt of Array
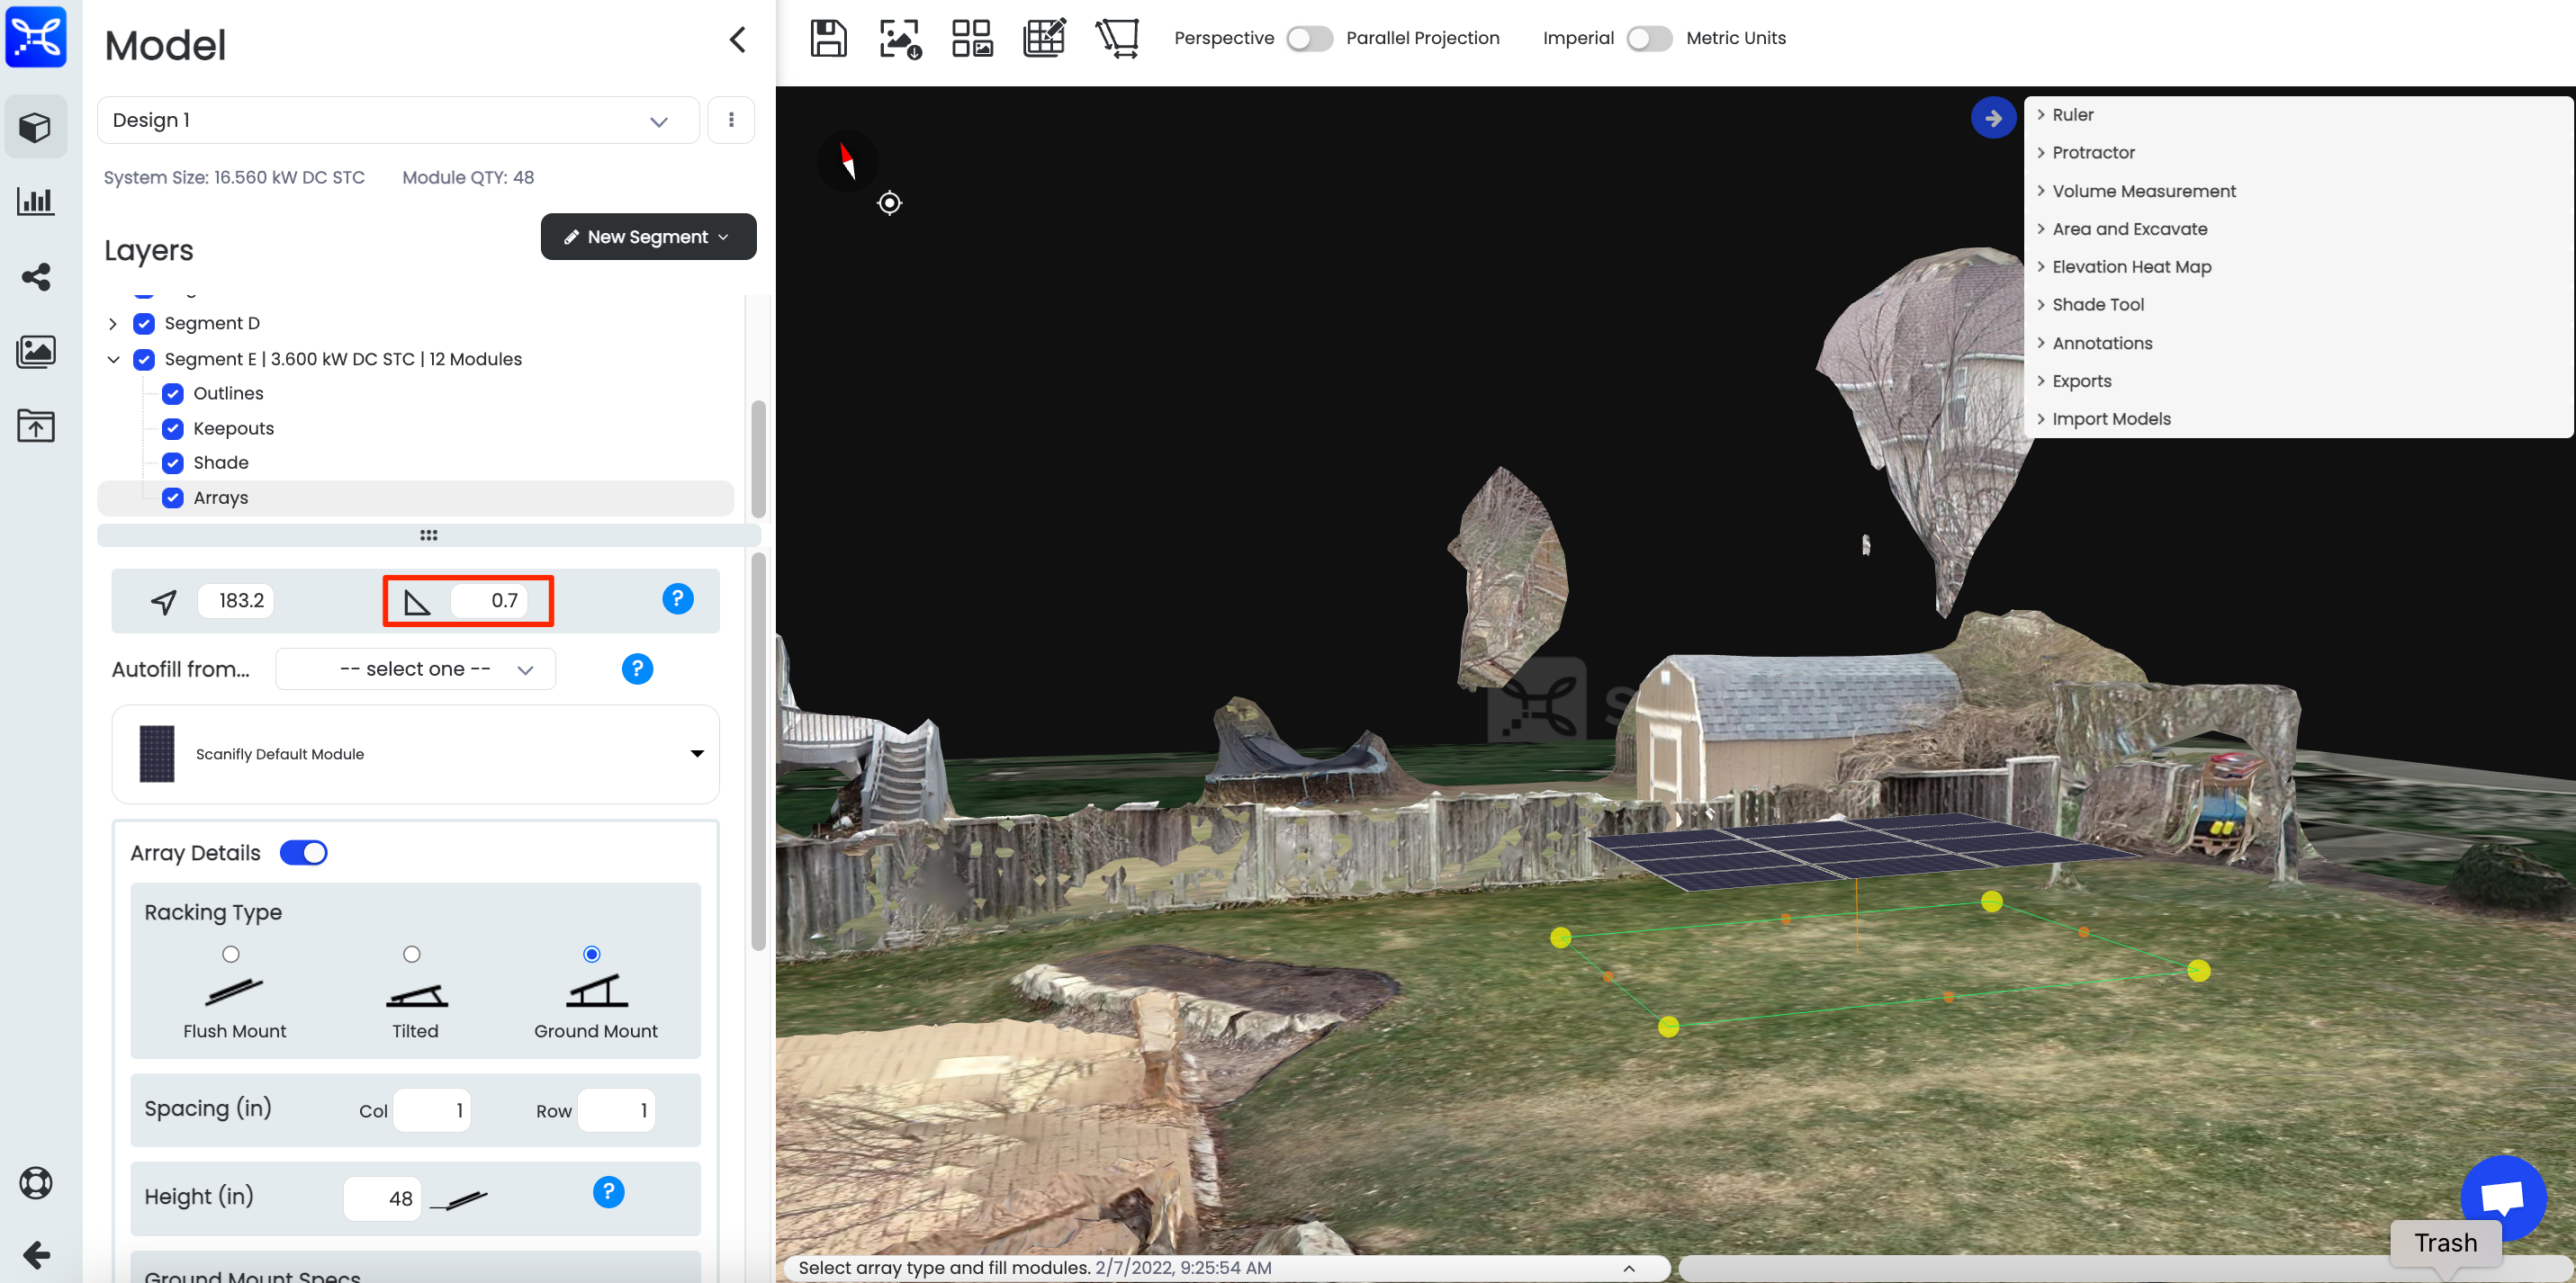
BEFORE
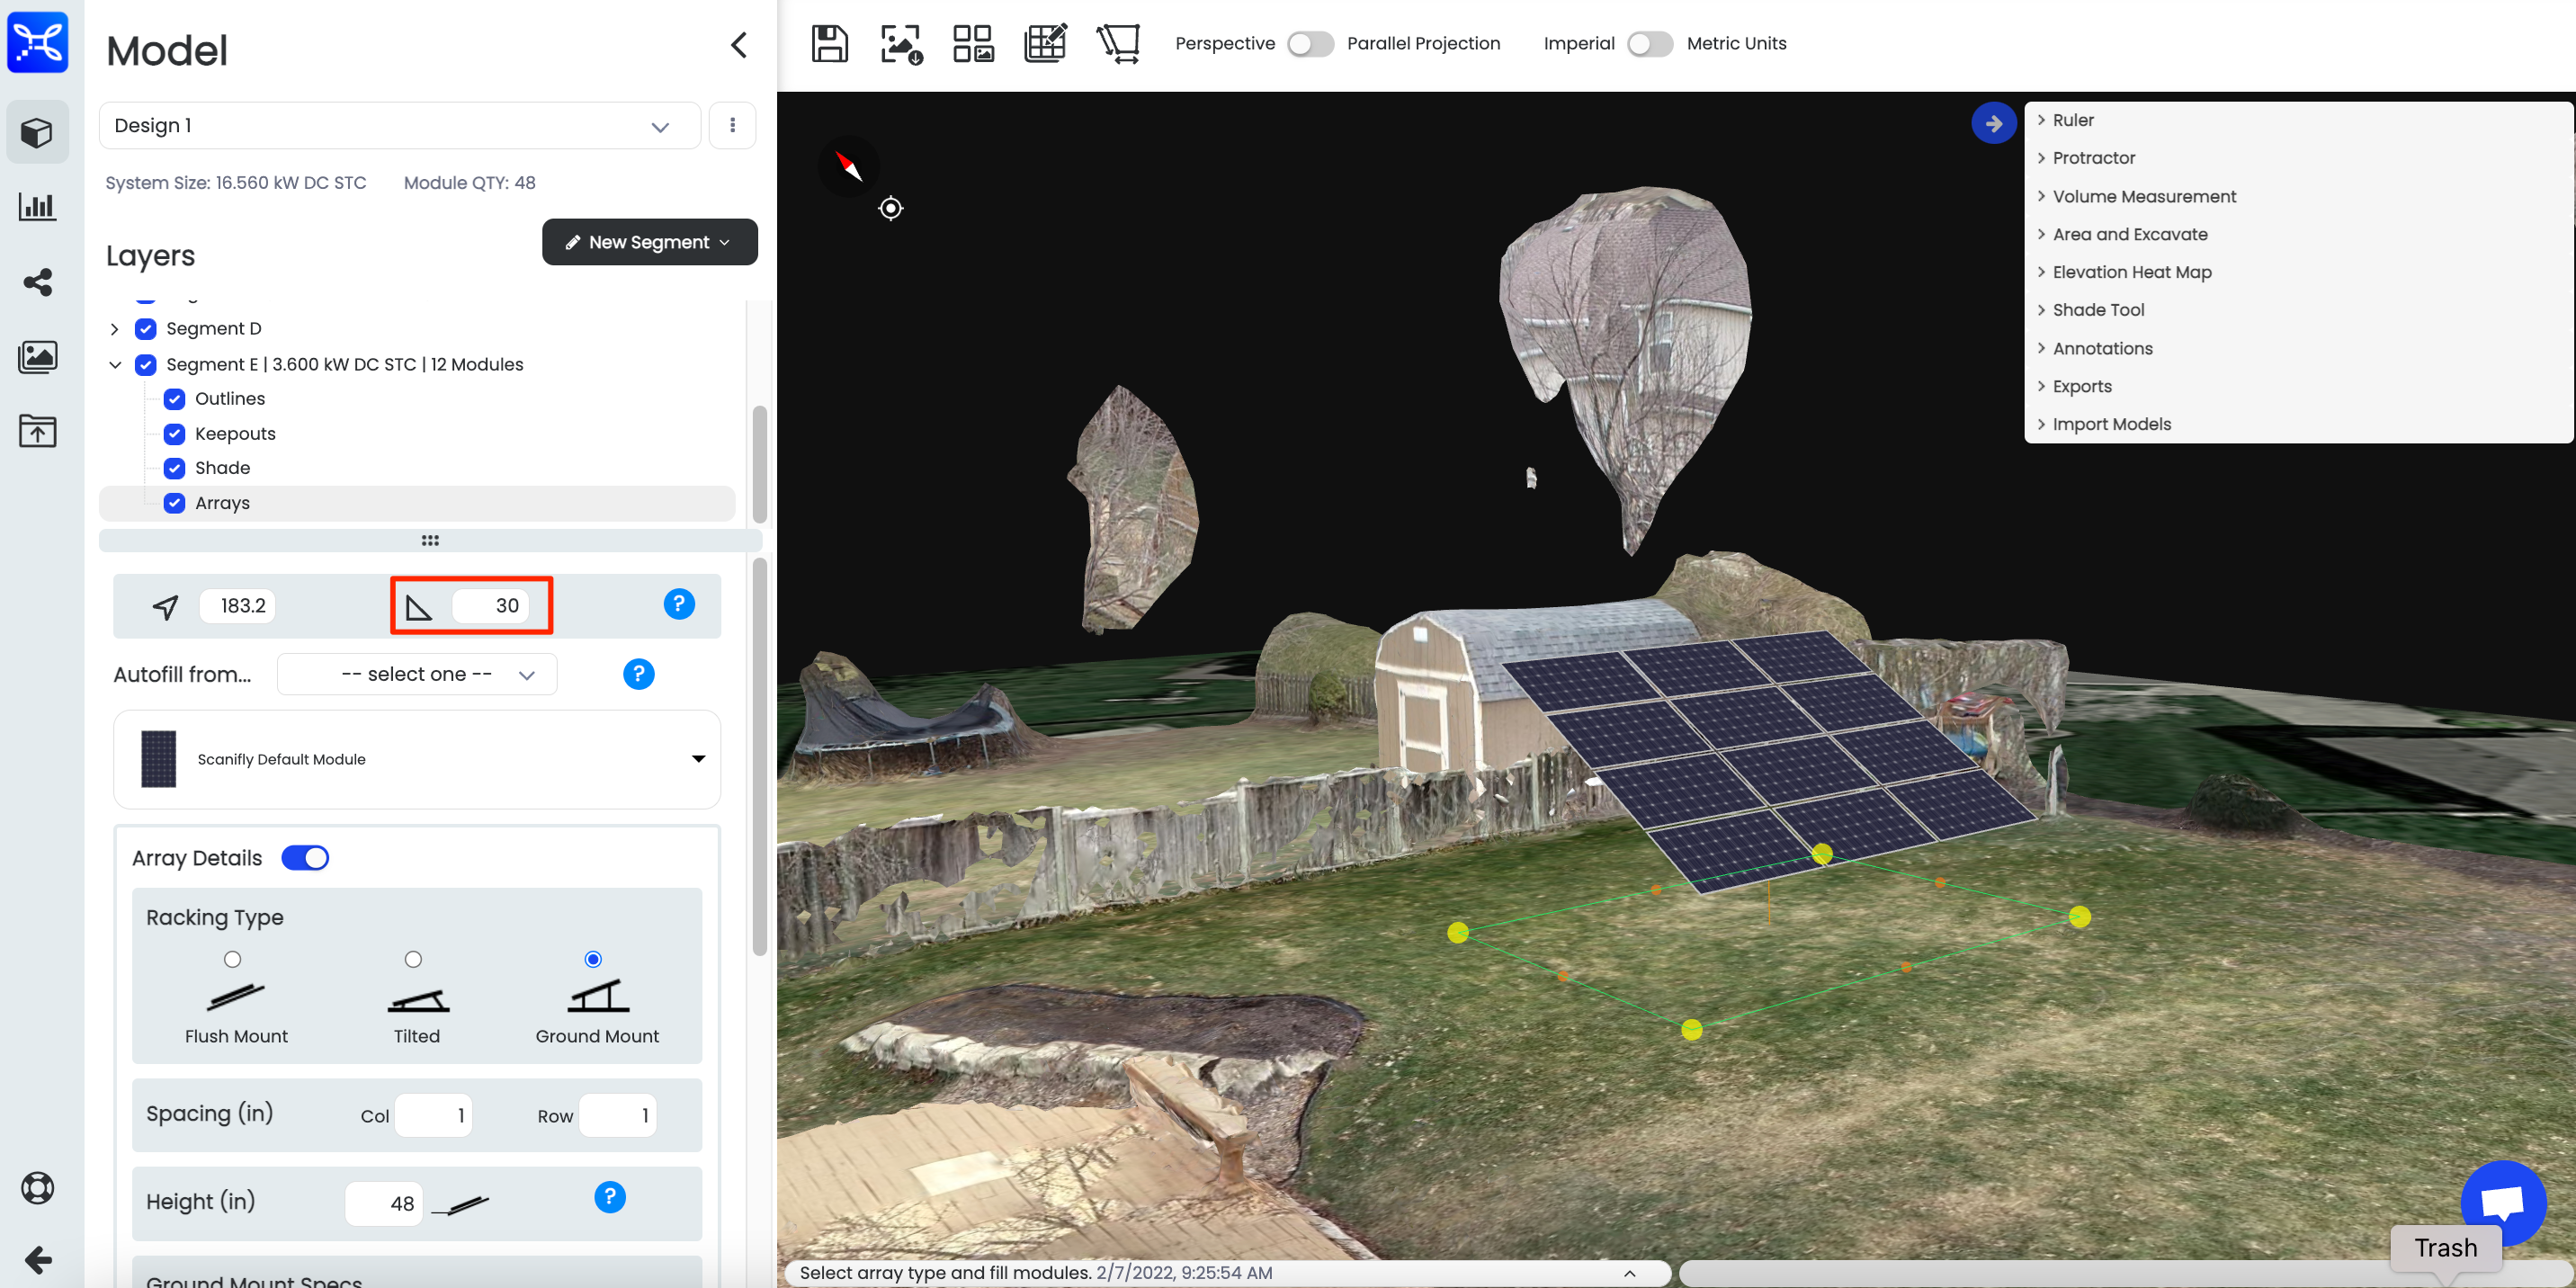
AFTER
5. Shade Analysis
Add viewsheds to the array modules and select the shade tool to see how the array will shade the surrounding area. You will want to use the shade tool, especially, if you have multiple ground mount rows.
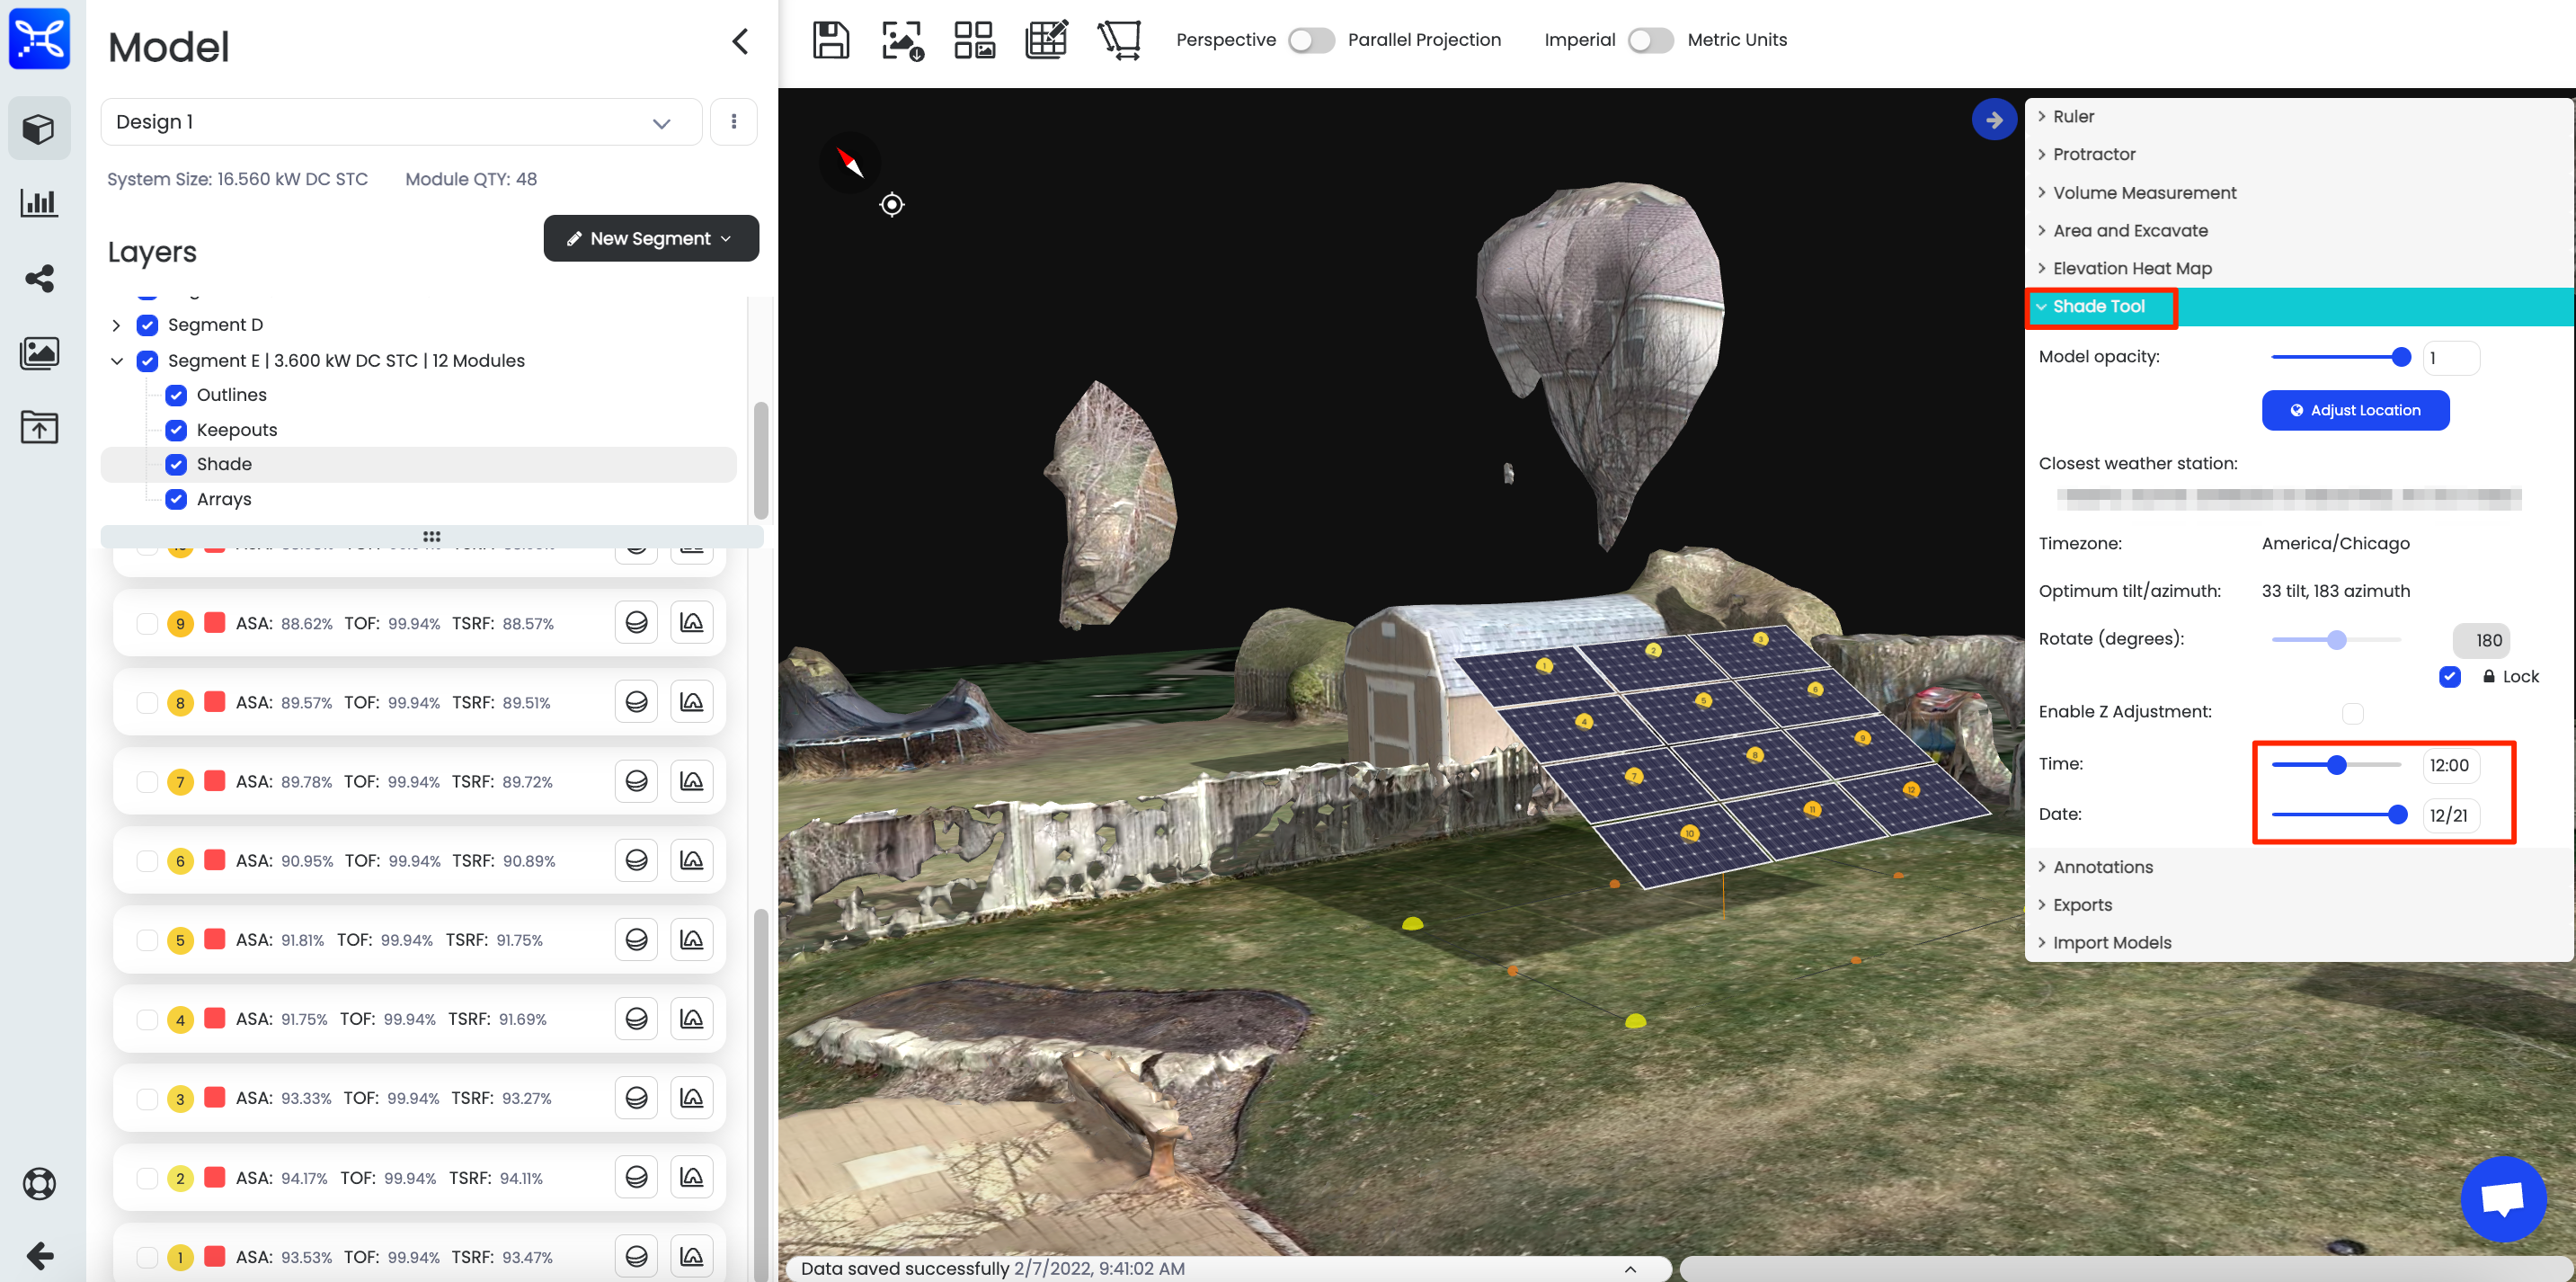
Viewsheds & Shading
Updated 1 day ago