Modifying Arrays
Adjusting arrays or modules after initial placement
Macro Adjustments

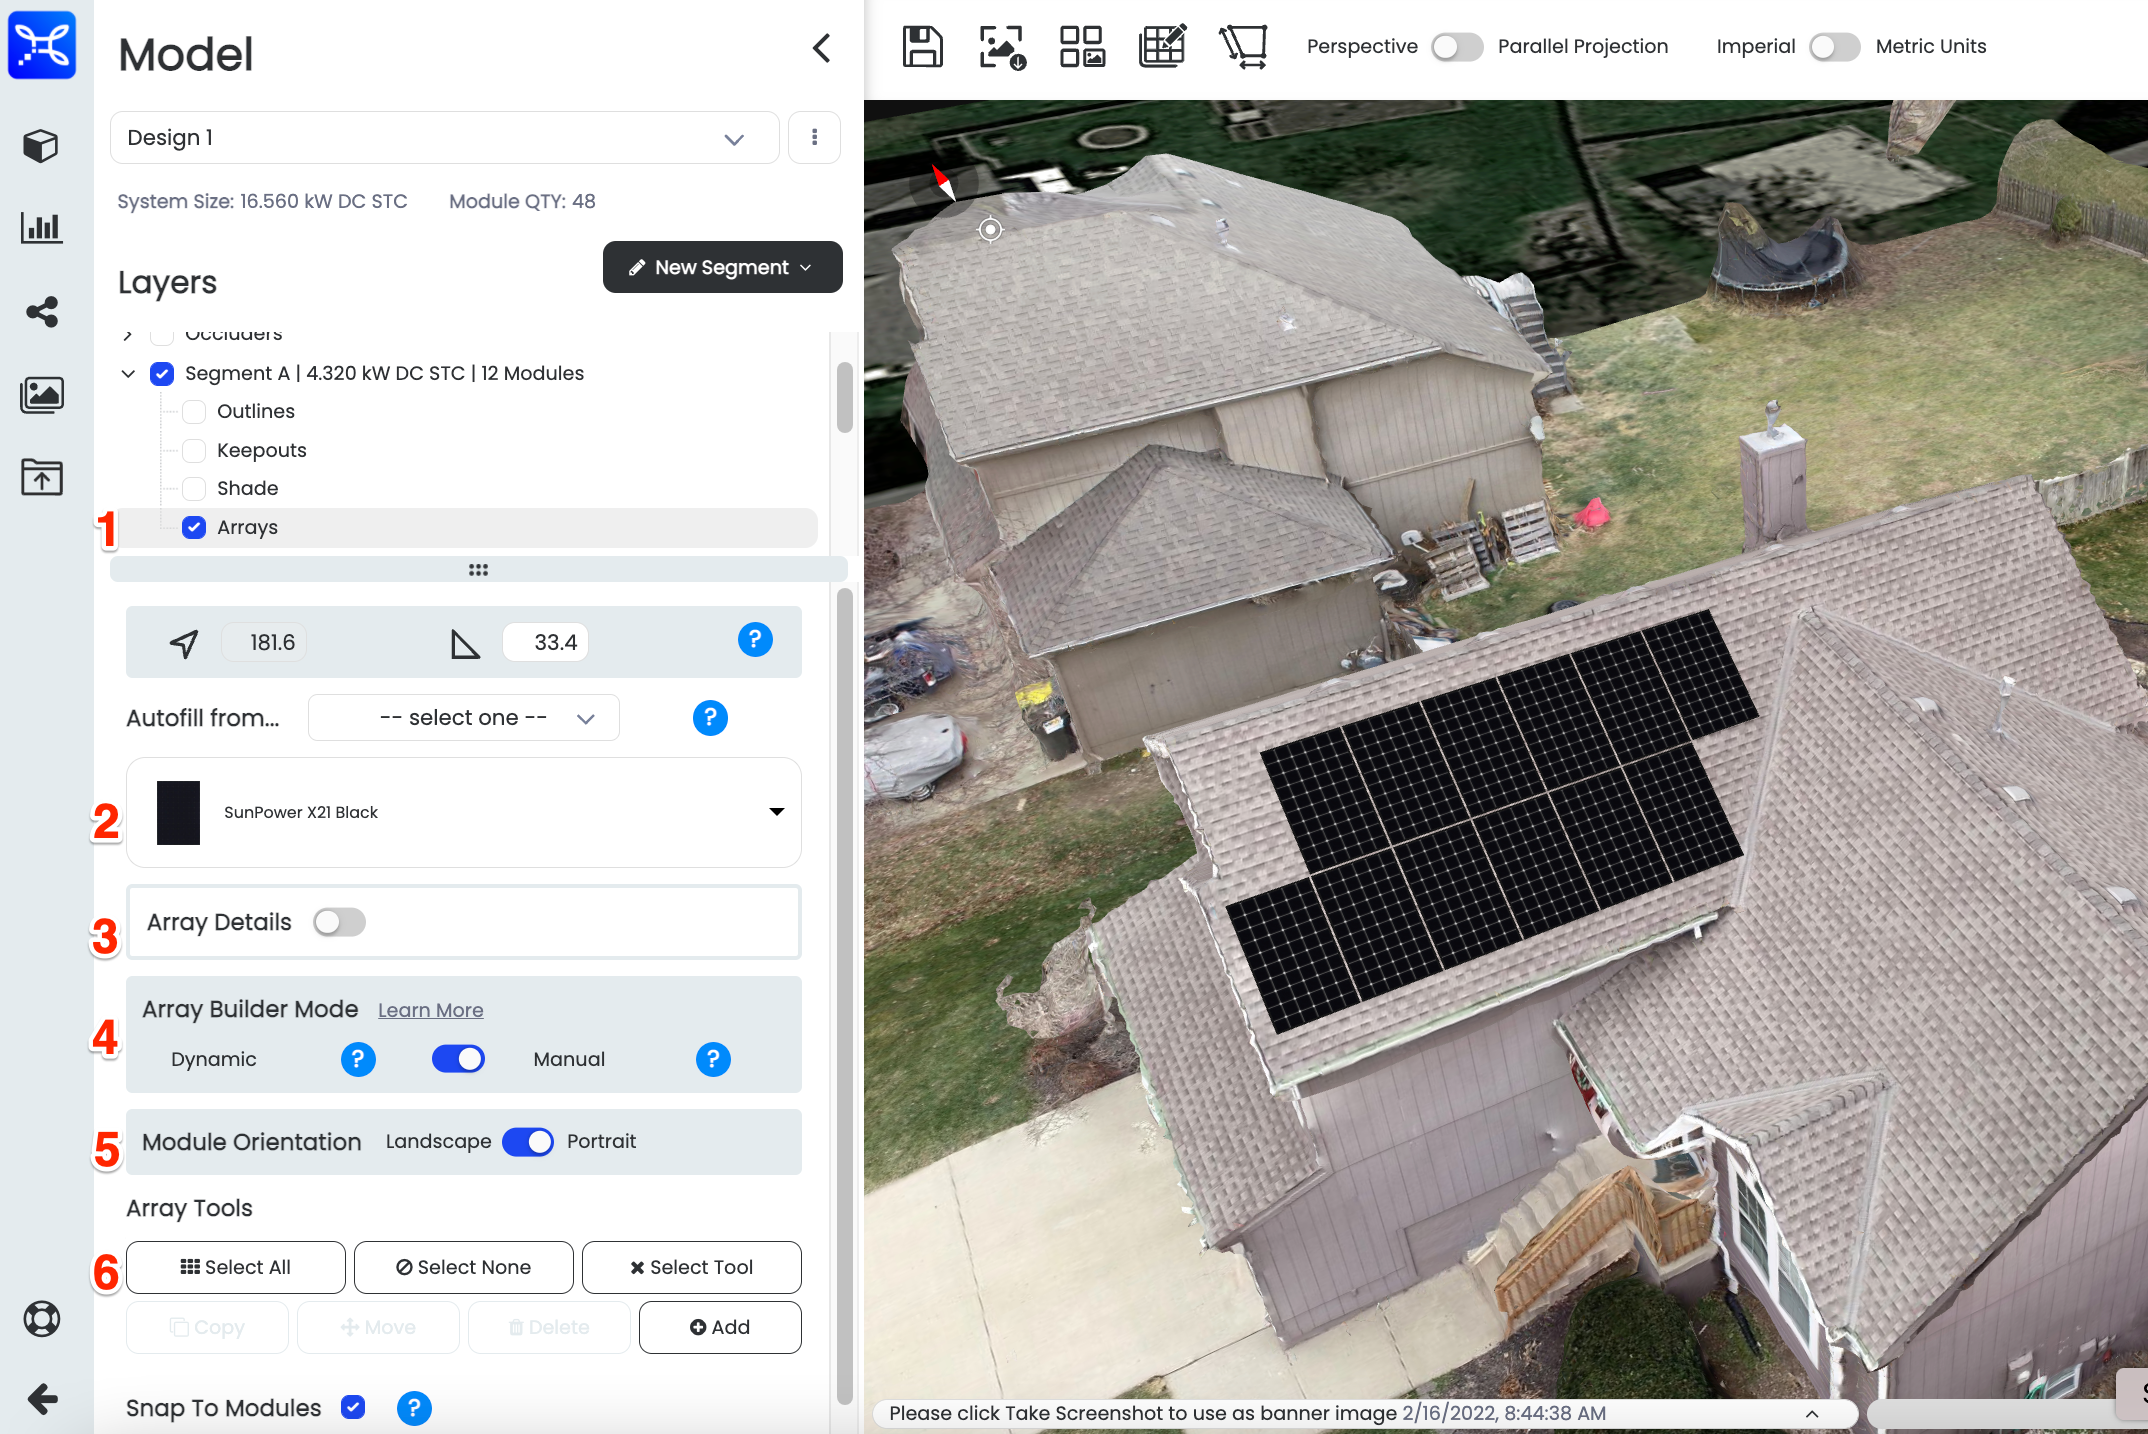
Modify Array
1. Show or hide an array by checking or unchecking the blue box.
2. Show the module type chosen for the particular Segment that you're working on.
3. Fine tune array specifications by toggling this option on. Review the Array Details section below for further information.
4. In order to make manual adjustments to an array or add a module, you will need to be in the Manual Array Builder Mode. If you change from Manual mode to Dynamic mode, your manual adjustments will be completely removed. Please use caution!
5. Prior to placing an array or individual model, you can toggle back and for between landscape and portrait mode to determine the best orientation for your module placement.
6.Within the Array Tools, you can perform multiple actions that allow you to manipulate the whole array or single modules. Once you select the whole array or an individual module, you will then activate the ability to copy, move, or delete the selected modules.
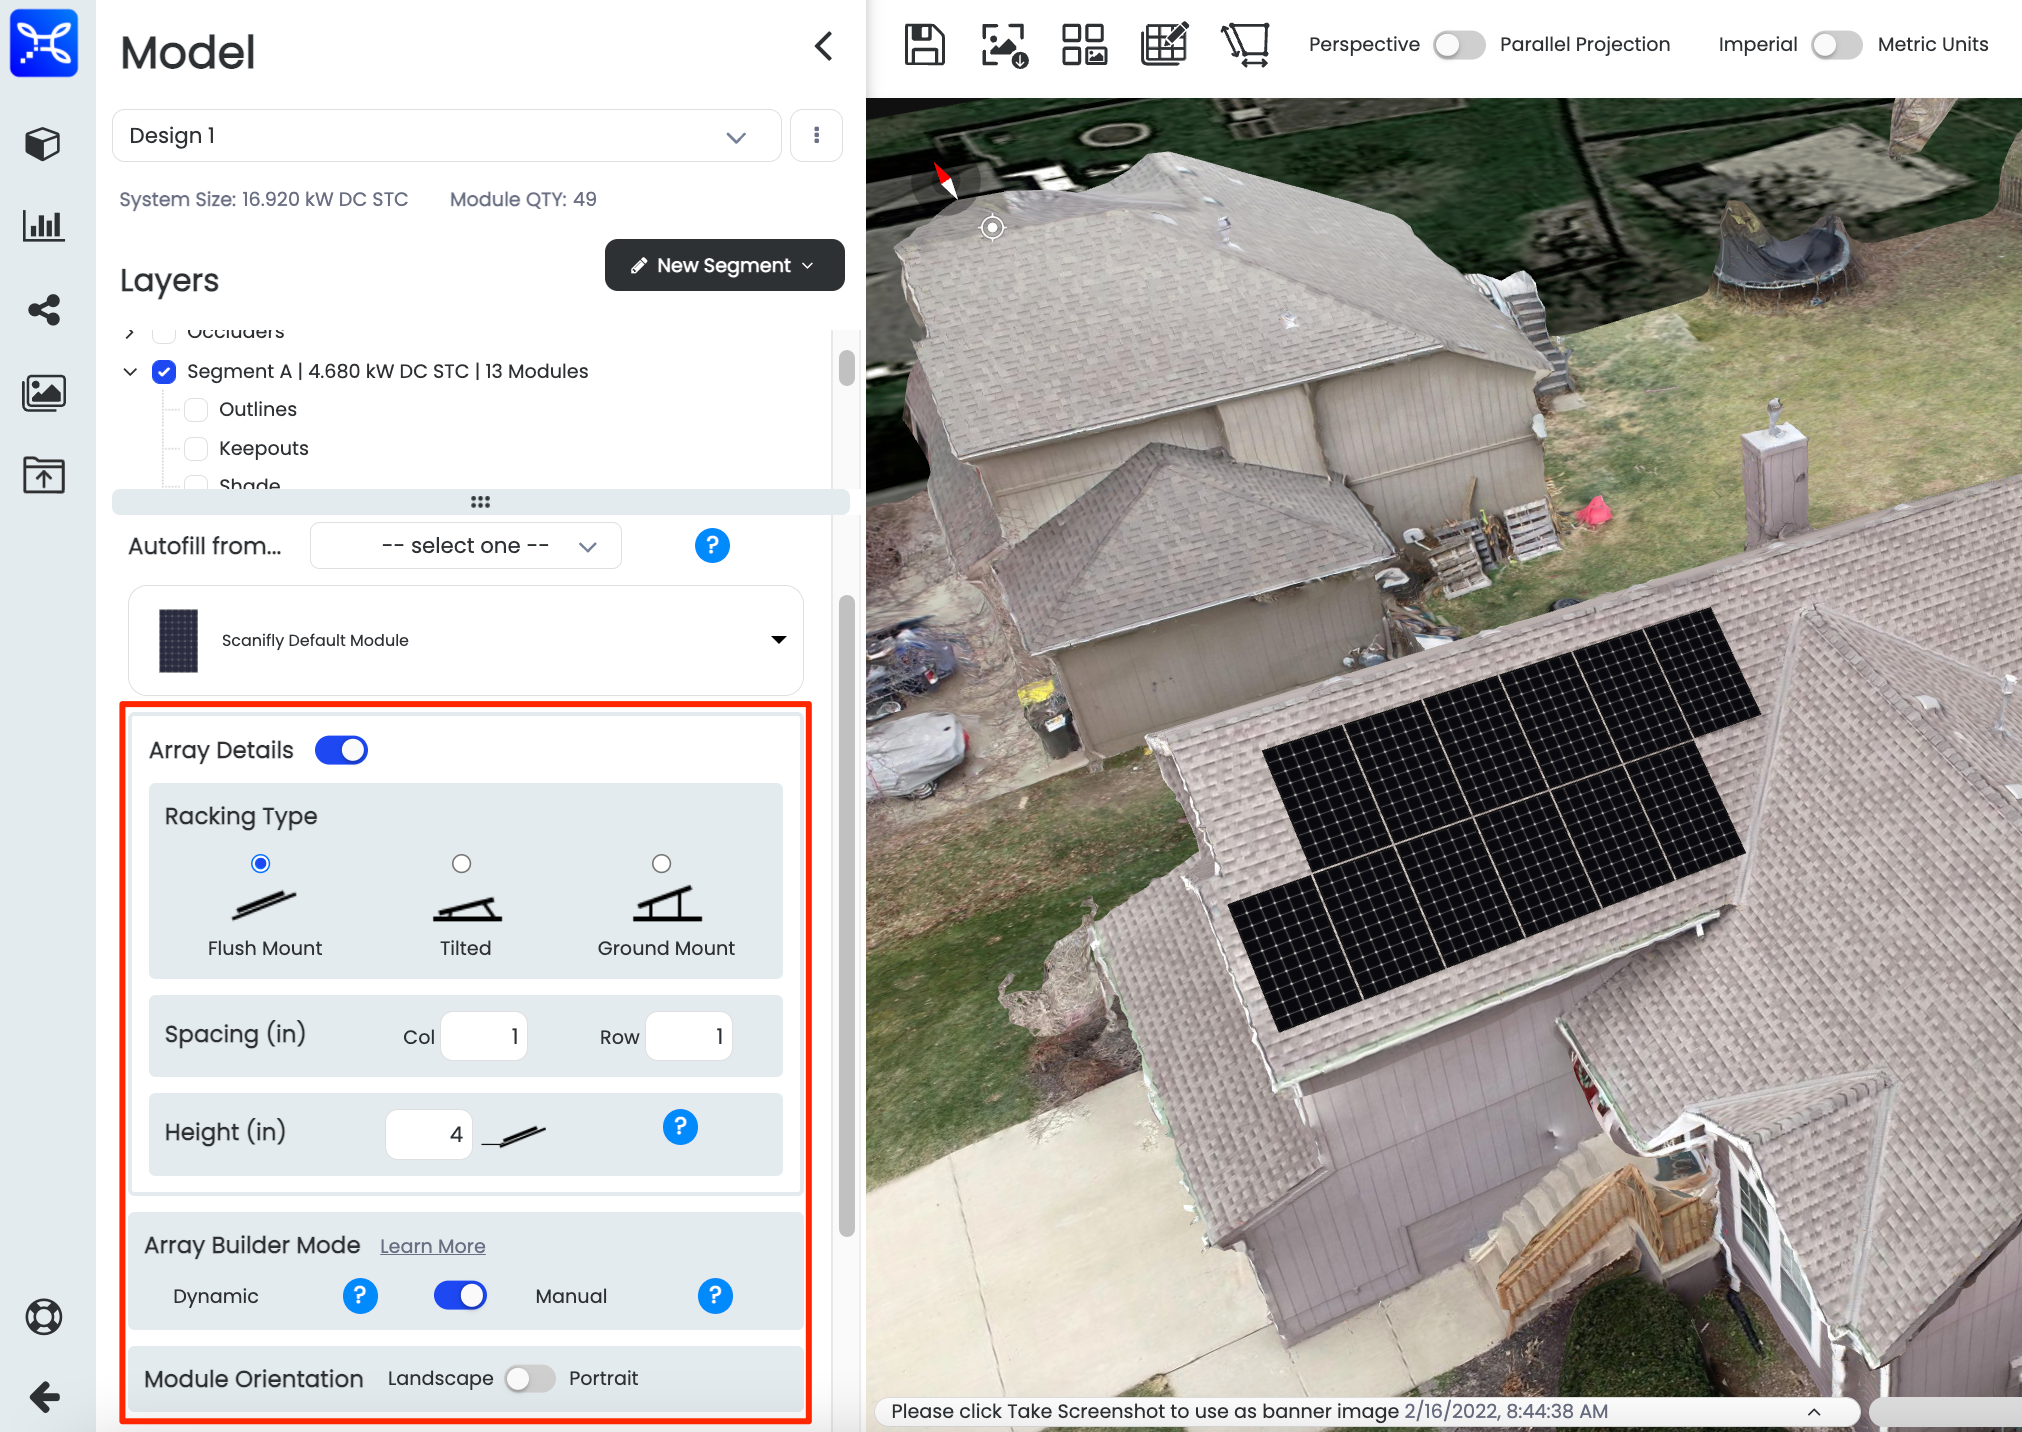
Array Details
Within the Array Details section, you have the options to switch your racking type, spacing between modules, and the height your racking system is from the surface plane.

Array Details
Review System Size and Dial in System Parameters
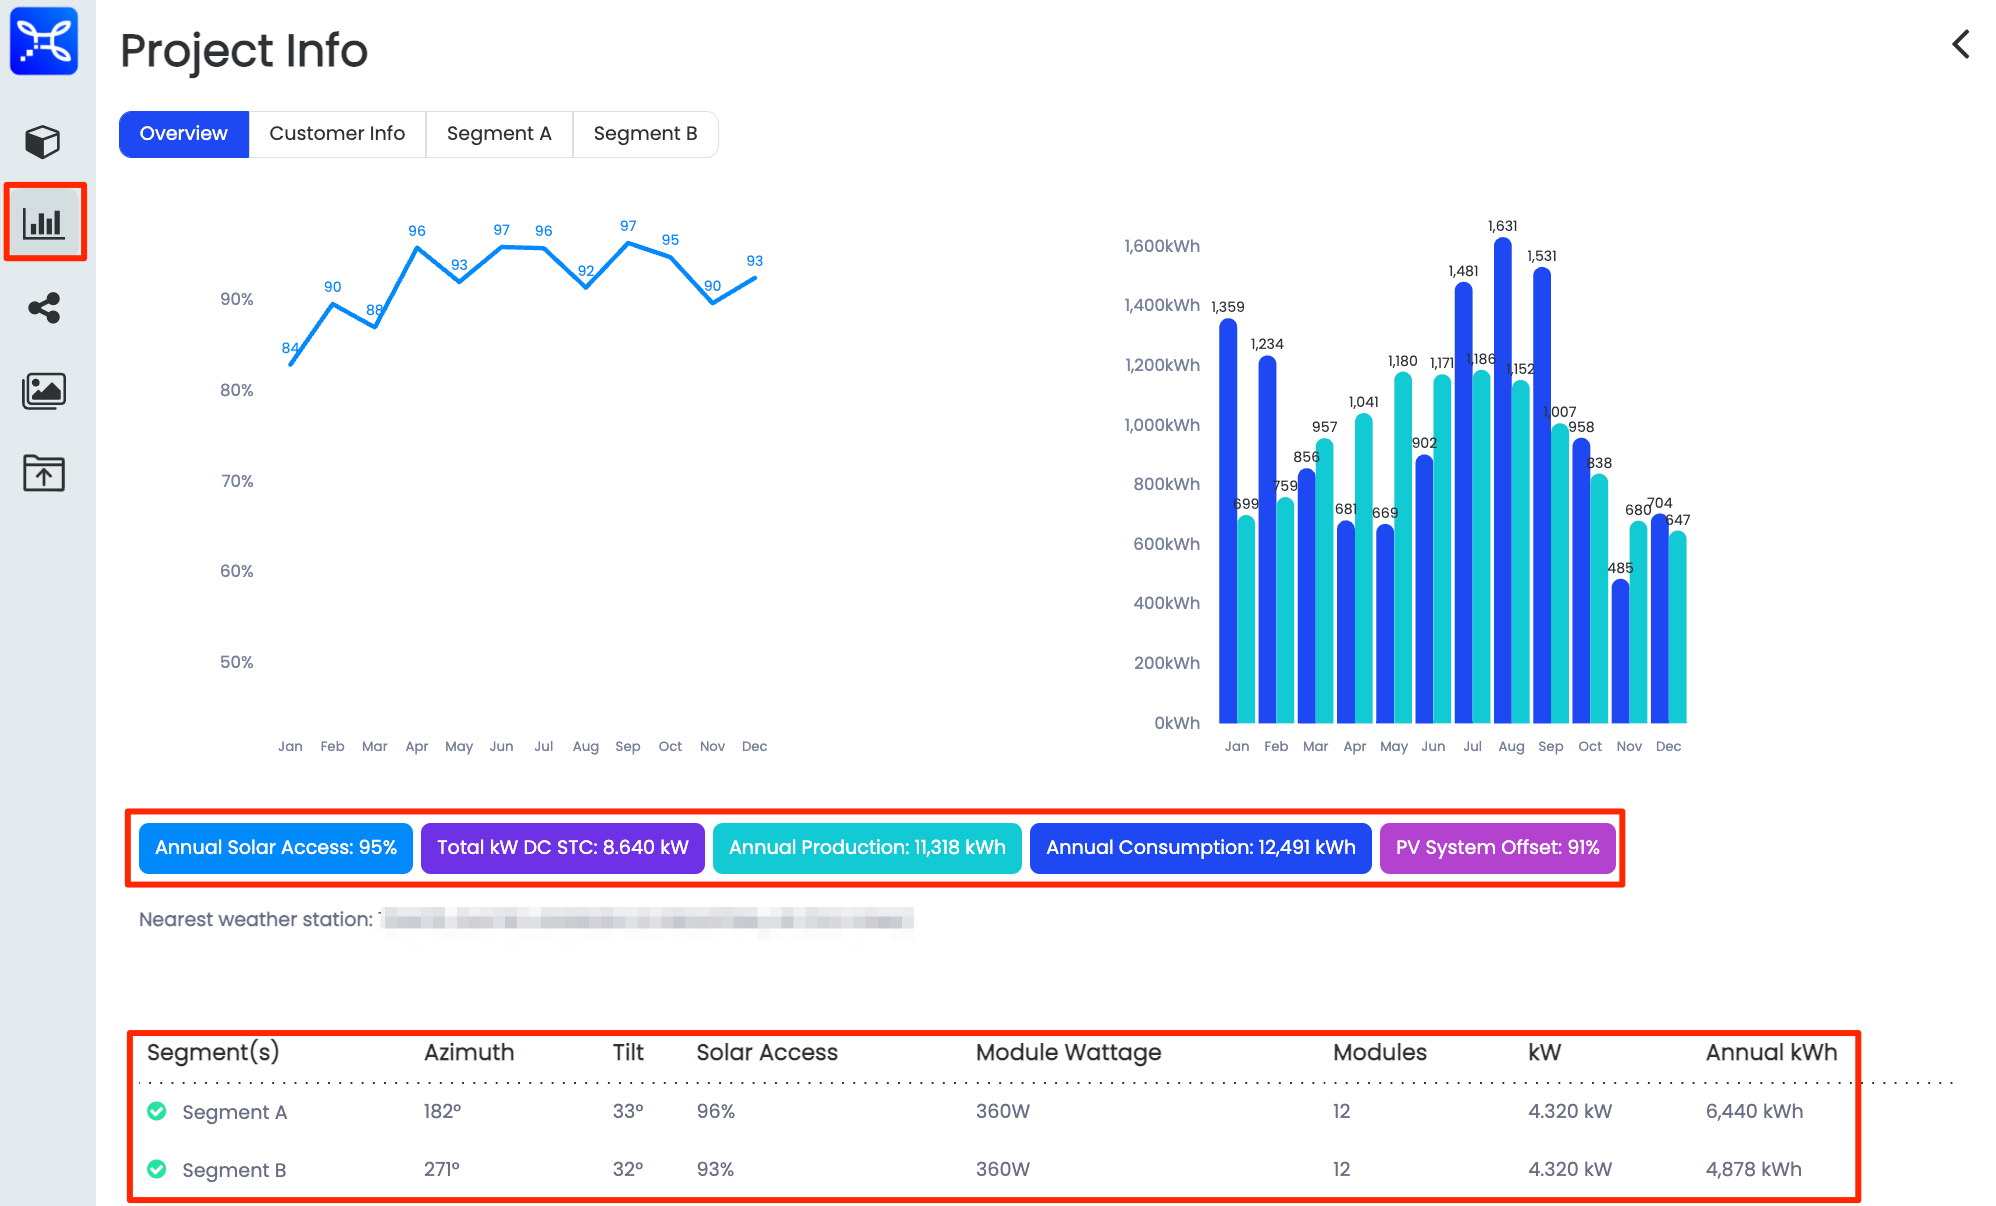
After clicking on the Project Info icon, you will be presented with the Overview of the PV System that has been built. Underneath the graphs, you will find totals of your PV System along with how the arrays on each segment performs individually.

PV System Overview
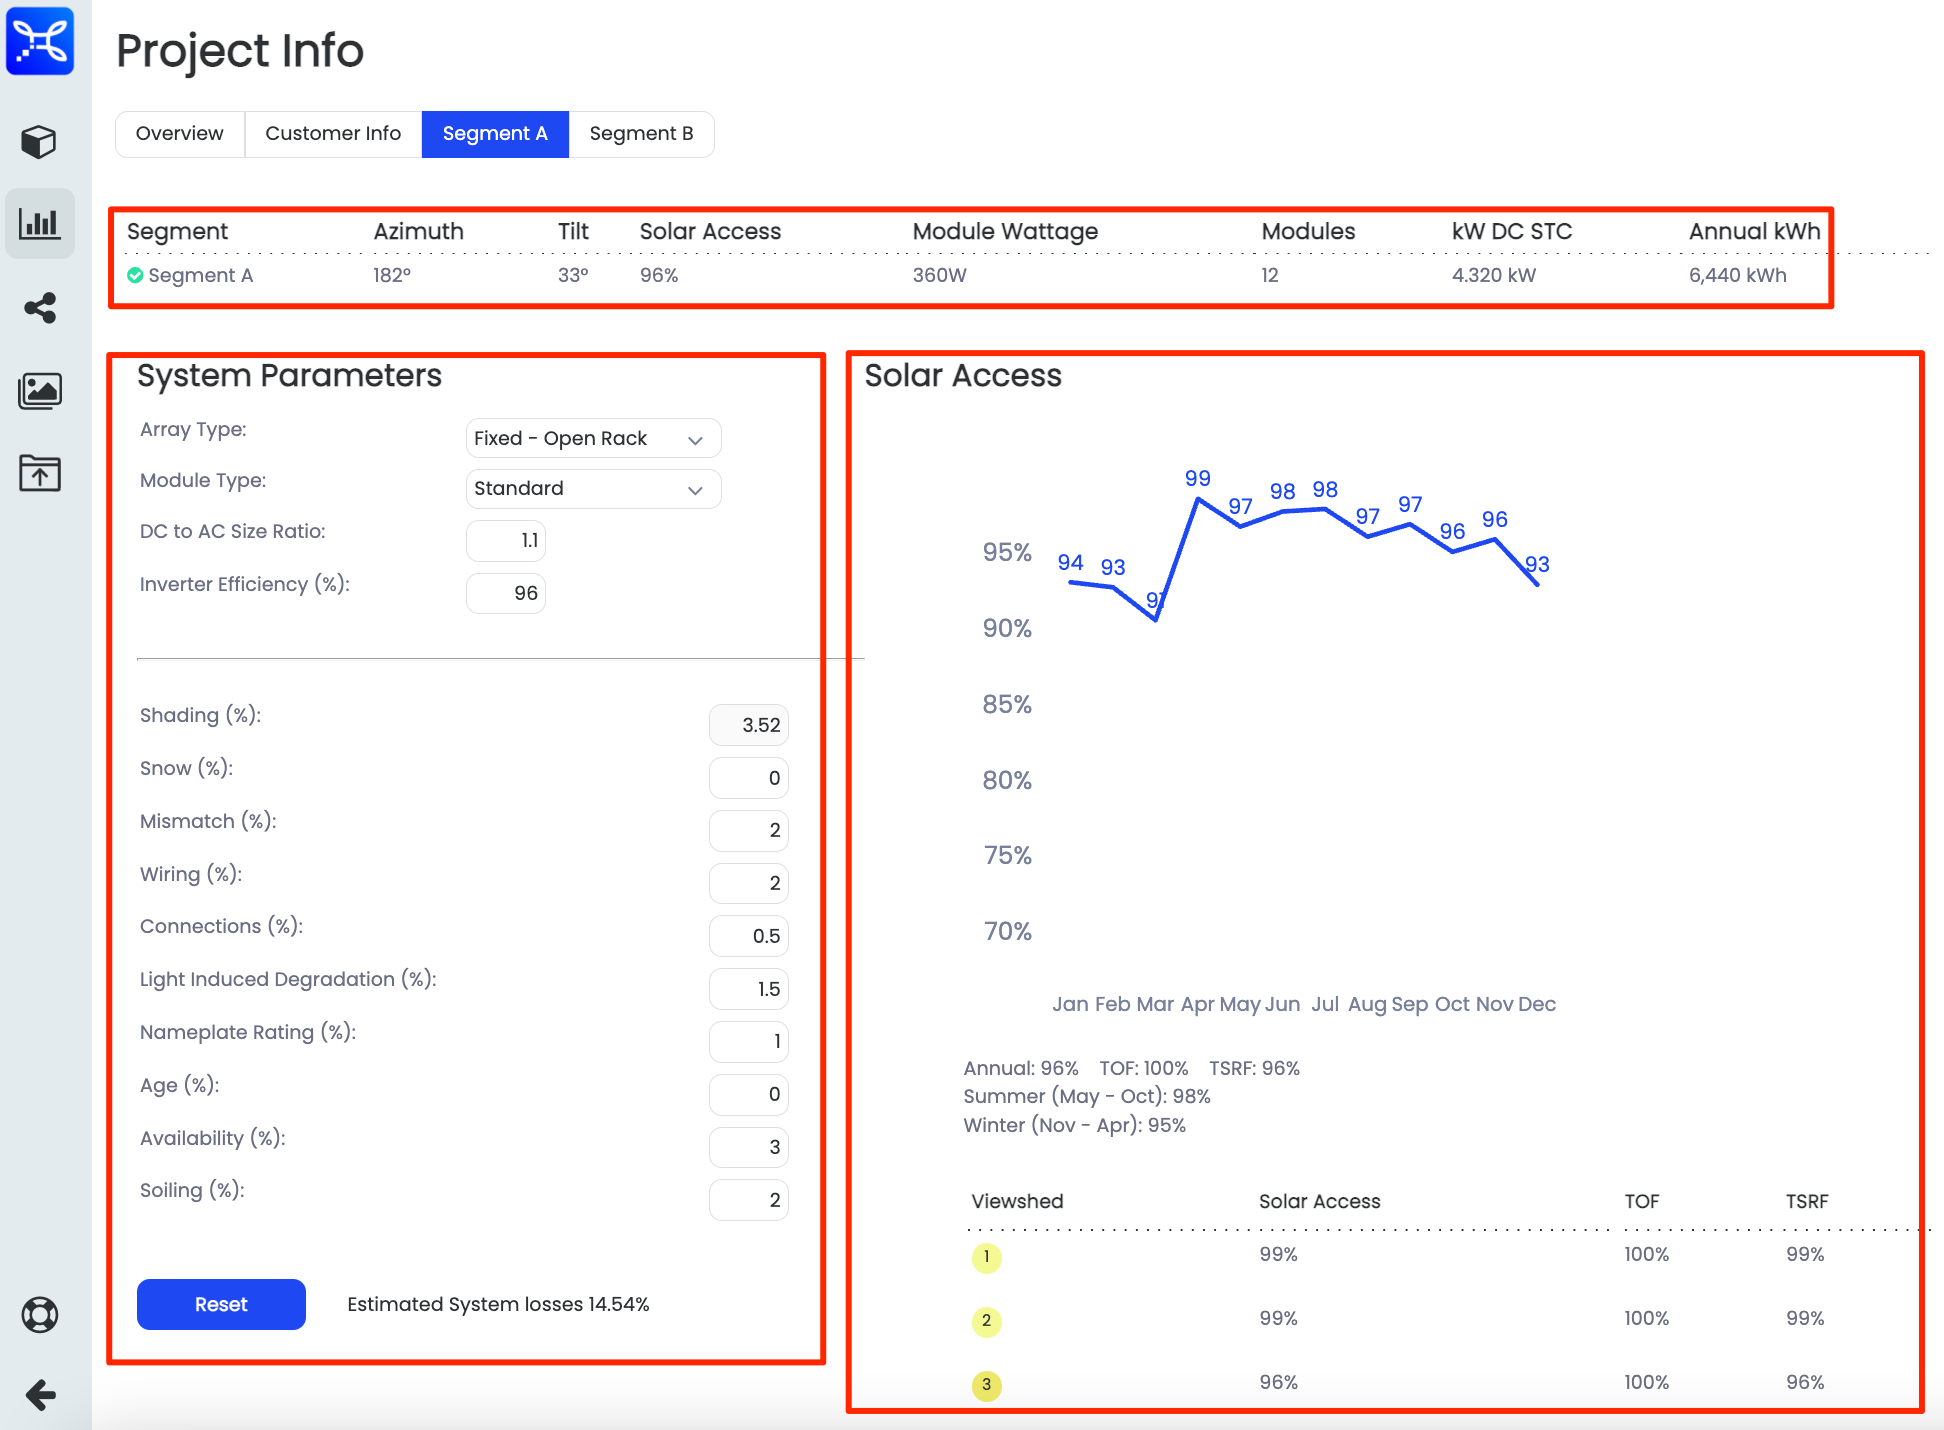
When clicking on a specific Segment that has been built, you will then be presented with additional details about the array and you will now have to opportunity to modify system parameters to better align with the actual environment the PV System will be in.

PV System Parameters
Updated 1 day ago