Generating Solar Access Viewsheds
Determine shading and production for PV system design
Please note
Before generating viewsheds, please be sure your tilt and azimuth are correct. The viewshed tilt and azimuth are determined by the segment outline in the segment outline array information section.
What are Solar Access Viewsheds?

A solar access viewshed in Scanifly.
Solar Access Viewsheds are used in Scanifly 3D in order to determine shading and production for designing a PV system. A solar access viewshed is a shade measurement in the 3D space that has an associated solar access, tilt and orientation factor and total solar resource factor measurement. The blue and red portion of the viewshed shows the sun throughout the year and what horizon angle it has throughout every day of the year from west to east. The black and green depict the shading that occurs on that particular viewshed by the surrounding environment (i.e. trees, buildings, etc.).

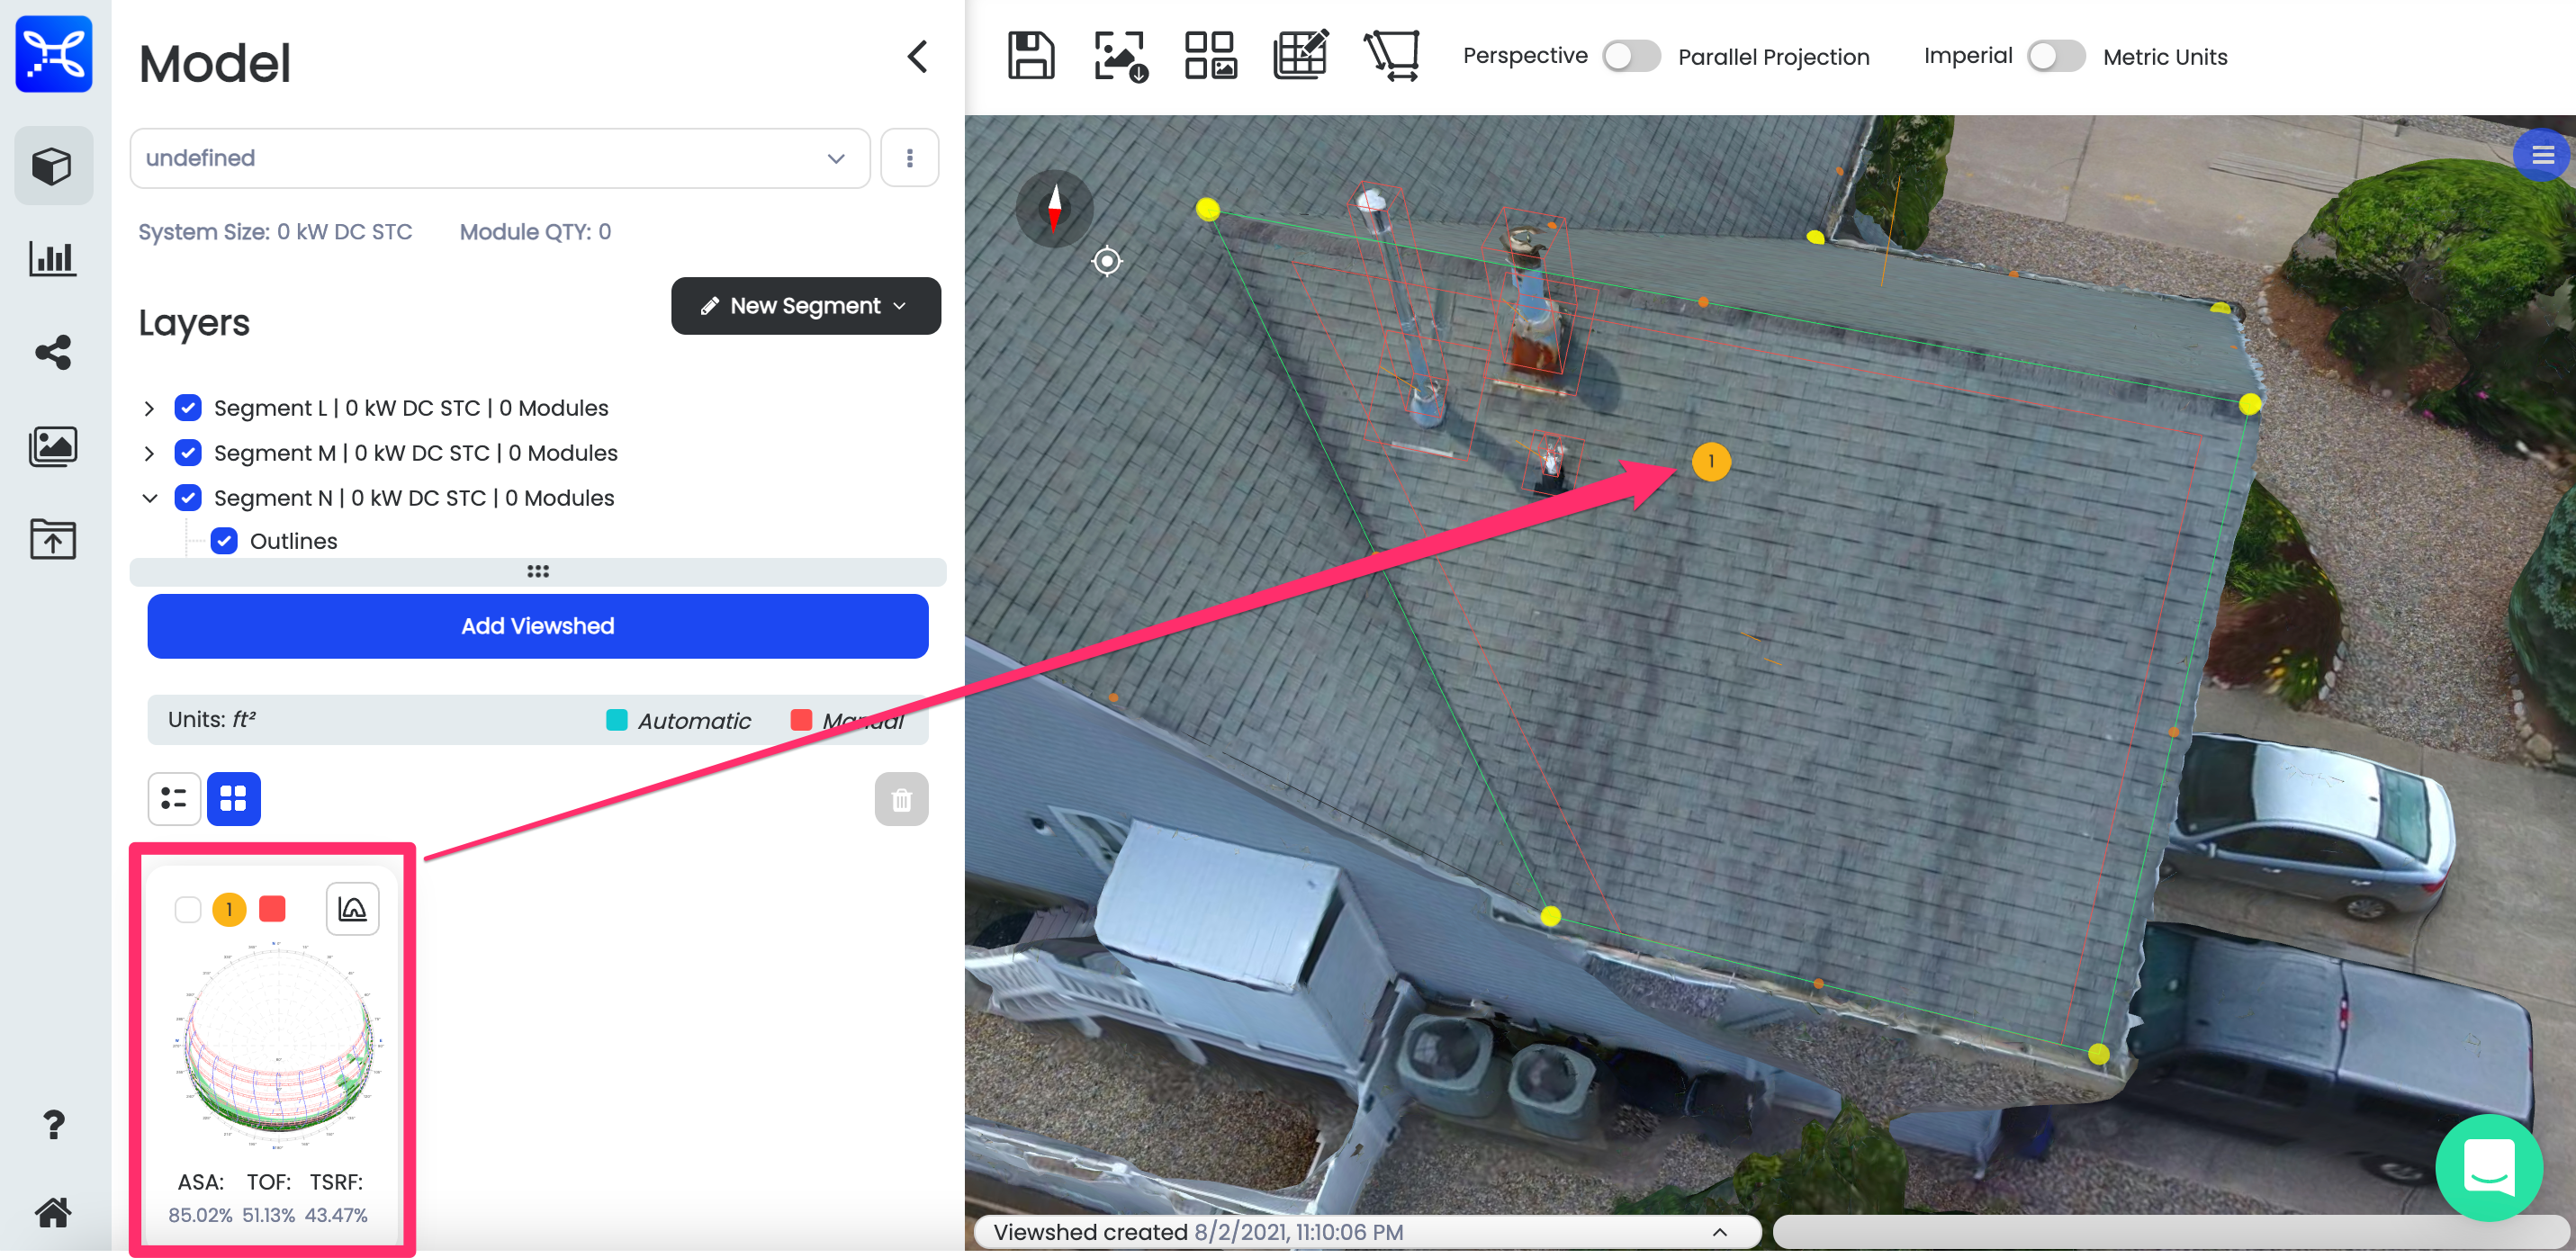
A solar access viewshed thumbnail in Scanifly.

A solar access viewshed horizon profile in Scanifly.
Solar Access Viewsheds are required for generating solar production data
Viewsheds and Production Estimate
At least 1 viewshed is required for each segment that has modules in order to generate production information in Scanifly.
Manually Generate Viewsheds

GIF showing the manual viewshed placement on a residential roof in Scanifly.
-
You can place a viewshed manually anywhere on the segment to generate a Solar access, TOF and TSRF measurement as well as a viewshed trace and a horizon trace.
-
In order to add a new viewshed to a segment, navigate to the segment you are working on and select the "viewsheds" section of that segment in the menu on the left hand side of the screen. You can add your first viewshed by hitting the 'Add Viewshed' button.
-
After hitting the Add viewshed button, you will notice that wherever the cursor is in the 3D environment will have a vertical yellow line hovering along with it. This indicates that you are ready to place a viewshed.
-
When you have moved your cursor to the area where you would like to generate a viewshed, left click to place the viewshed in the 3D environment.

Screenshot showing the "Add viewshed" option in the menu on the left side of the Scanifly 3D window.
Placing Multiple Solar Access Viewsheds
-
You will see after placing a viewshed that there will be a numbered viewshed icon that will be left in the place where you clicked to place the viewshed.
-
Now you are ready to add more viewsheds on the roof surface. It is best to place viewsheds around your roof surface in order to properly estimate production based on site specific shading.
Quickly add Manual Viewsheds
If you are adding more than 1 viewshed, you can hit 'Space' or 'Enter' after the first viewshed is placed to quickly add more viewsheds without having to hit the 'Add viewshed' button in the Scanifly interface.
Automatically Generate Viewsheds & Adjust Grid Density

GIF showing the automated viewshed function on a residential roof in Scanifly.
If you would like to place multiple viewsheds across a large and complex array surface, you can place viewsheds automatically in Scanifly 3D using the Automatic viewshed functionality.

Screenshot showing grid density adjustment slider for Automated Viewsheds in Scanifly 3D.
Adjust the grid density slider in the Automatic Viewsheds section of the segment that you would like to place viewsheds on.

Screenshot showing a medium grid density adjustment slider for Automated Viewsheds in Scanifly 3D.
If there are a lot of shading obstructions on or nearby the roof, it is better to use a denser grid setting than if the roof is unshaded.

Screenshot showing a high grid density adjustment slider for Automated Viewsheds in Scanifly 3D.
Once you have reached your desired grid density for your design scenario, hit the "Generate" button to load all of the viewsheds on your segment outline.

Screenshot showing the Generate button for Automated Viewsheds in Scanifly 3D.
-
After generating viewsheds for your segment, you will notice that the segment will have an overall Annual Solar Access (ASA), Tilt and Orientation Factor (TOF) and Total Solar Resource Factor (TSRF).
-
Additionally, if you would like to delete all of the viewsheds that you just generated, you can do so by hitting the "Delete All" option in the automatic viewsheds menu.

Screenshot showing segment viewshed information and the Delet all button for Automated Viewsheds in Scanifly 3D.
Managing Automatically Generated Solar Access Viewsheds
-
After generating viewsheds for your roof surface, you will notice that each shade measurement has a color associated with it based on the ASA of that shade point. The higher the ASA the brighter/more yellow the dot will appear. The lower the ASA the darker/redder the dot will appear.
-
You can view all of the viewsheds and their corresponding ASA, TOF and TSRF values by hitting the List View button. From there you can individually access the Viewshed traces and generated horizon profiles for each viewshed.

Screenshot showing the gradient viewshed icons and list view of Automated Viewsheds in Scanifly 3D.
You can also view all of the viewsheds and their corresponding ASA, TOF and TSRF values by hitting the thumbnail button. From this, you will be able to view each viewshed trace without having to open them one by one. From there, you can individually access the generated horizon profiles for each viewshed.

Screenshot showing the gradient viewshed icons and thumbnail view of Automated Viewsheds in Scanifly 3D.
If you would like to more easily scroll through the generated viewsheds, you can expand the left portion of the window to more easily browse your generated viewsheds.

Screenshot showing expanding the menu for viewing Automated Viewsheds in Scanifly 3D.
Updated 1 day ago